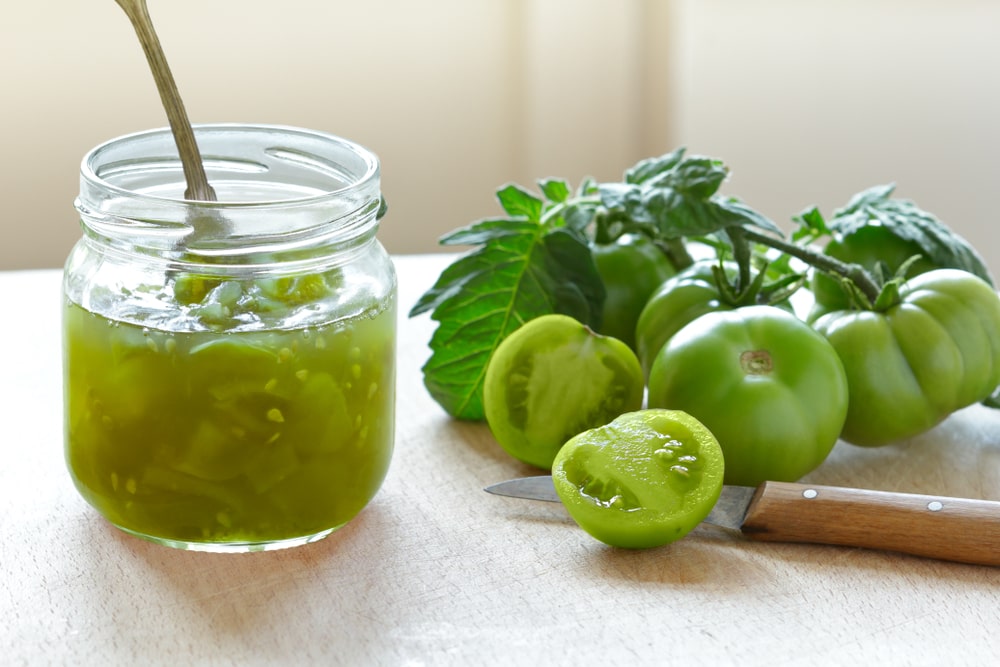
One hardy crop, tomatoes, retains its green splendor as the days become shorter and nature changes to the brilliant colors of fall. While our gardens experience a lovely change as the seasons change, we also have access to an excess of tomatoes that defies our culinary creativity.
We were fortunate to have a bumper crop of tomatoes this year, giving us more delicious fruits than we could ever consume. As I pondered what to do with this abundance of tomatoes, I set off on a savory quest of exploration, looking into the world of green tomato jam recipe for canning to consume as well as preserve.
What does green tomato jam taste like?
Have you ever been curious about the flavor of green tomato jam? I’ll tell you about my experience now. You might not anticipate it, but green tomato jam has a taste that is both exceptional and delightful. It’s worth investigating, I promise!
Green tomato jam’s flavor might vary depending on the recipe and extra ingredients used, but it often delivers a delicious blend of sweet and acidic flavors. When you bite into a green tomato, you’ll taste the tomato itself, which is slightly sour and tart. This tanginess distinguishes green tomato jam and gives your tongue a little twist.
But the overall flavor of the jam is balanced by the tanginess. The taste profile is balanced because of the sweetness of the sugar and any additional fruits or spices, which go wonderfully with the green tomatoes. You could taste a faint citrus or spice undertone, depending on the recipe. A symphony of tastes, that’s what it is!
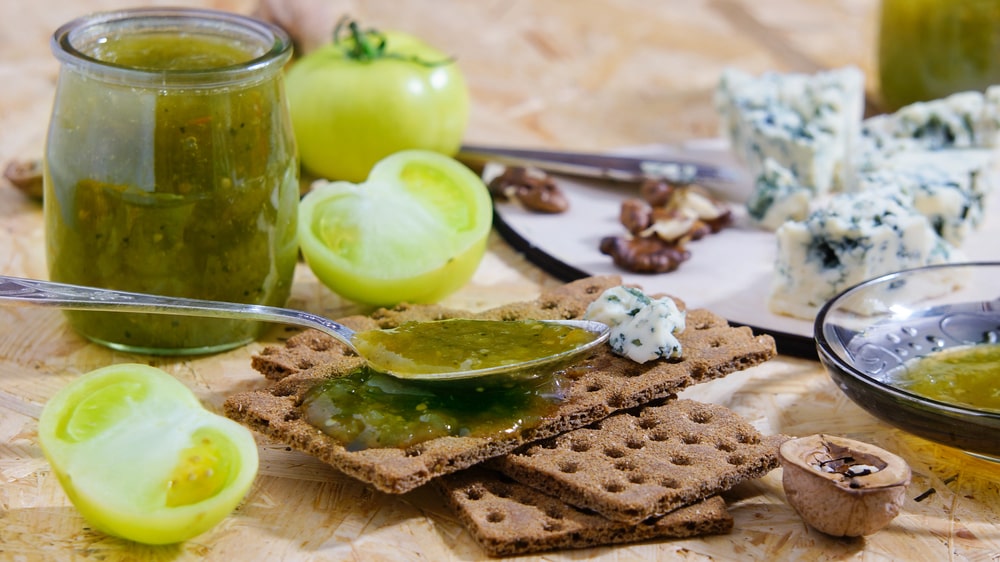
You might be wondering how to use this unusual condiment at this point. In any case, there are many different ways to enjoy green tomato jam. For a blast of tart sweetness, spread it on warm biscuits or freshly baked toast. It may also be used with cheese to provide a lovely flavor and textural combination. There are countless options!
I suggest green tomato jam as a flexible condiment that gives a wonderful flavor to various foods after doing my research. It’s more than a spread; it’s a taste booster that can elevate your culinary masterpieces.
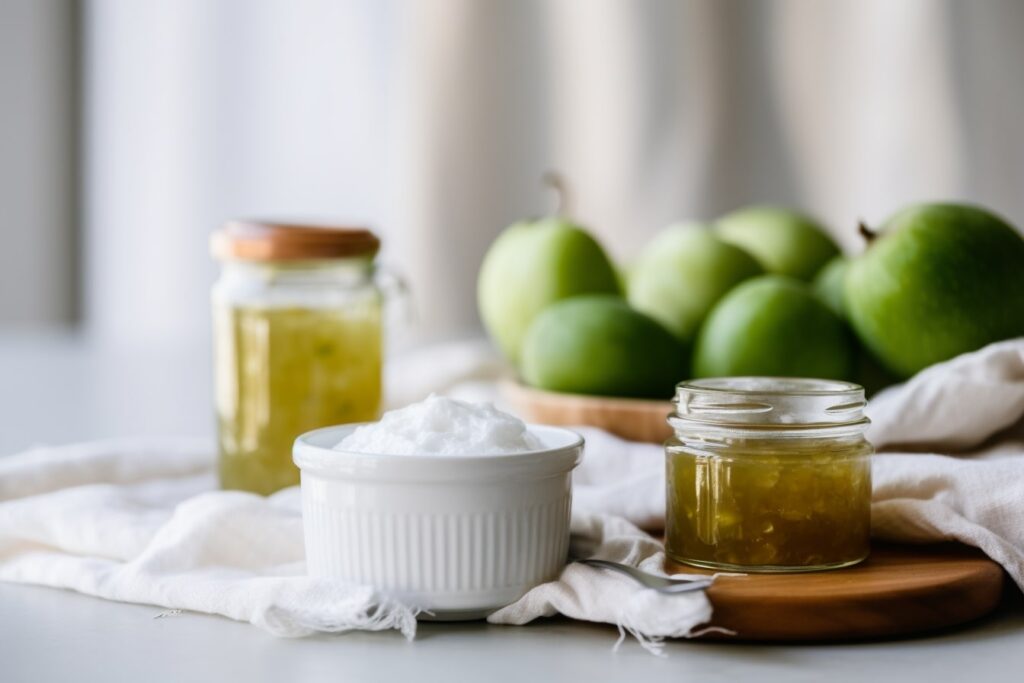
Ingredients for a yummy green tomato jam jars
Today, I want to give you a fantastic, time-tested recipe for green tomato jam that has stood the test of time! With just the proper amount of heat to keep things interesting without being overpowering, this jam sets up beautifully.
- 6 pounds of green tomatoes, chopped (approximately 8 cups)
- 5 cups of granulated sugar
- 1/4 teaspoon of ground cinnamon
- 1/8 teaspoon of chopped pineapple
- 1 lemon, deseeded and thinly sliced for juice extraction
You’ll need 6 pounds of green tomatoes to make this delicious green tomato jam, yielding 8 (1/2-pint) or 4 pint-sized jars. Typically, it comes out to be about 24 medium-sized tomatoes, but don’t worry if the number changes; a dependable kitchen scale will take care of that guesswork for you. By the way, the smaller green cherry tomatoes and the bigger green heritage kinds I used for this dish turned out wonderful!
To be clear, this “green tomato jam” is made with underripe tomatoes, not fully ripe, totally green heritage tomatoes. Do not worry if you have typical, ripe tomatoes that are only green in color. For that, I have a different recipe for tomato jam. Still really tasty, however since fully ripe tomatoes have less natural pectin, the cooking method may change a little.
Let’s now discuss the sugar. I am aware that the recipe calls for 5 cups, which may seem excessive. However, after conducting my experiment, I discover that it is essential for producing a jam of the highest caliber. In addition to providing sweetness, the sugar aids in setting. Unlike sweet blueberries or peaches, green tomatoes require an additional boost to get the ideal consistency.
But don’t worry! I can help you if you want to cut back on the sugar content. I’ve tried lowering the sugar to just about 2 cups, and the jam still sets up well. Just be aware that the sweetness will be less intense and the yield will be smaller. A relish-like texture will result, which might be a great substitute if you’re looking for something a little tangier.
Here’s a quick tip I learned while experimenting in the kitchen: add 1/8 teaspoon of sliced pineapple pieces. This straightforward addition gives the jam a lovely chunky texture that ups the thrill factor in every bite. It changes the game, I assure you!
As a result of my extensive research, I strongly advise attempting the original recipe first. Let the flavor of those green tomatoes take over and pleasantly surprise you. The version with added sugar best captures the flavor of green tomato jam.
Once you’ve tried it, you can always adjust the recipe to your personal preferences. Create your own unique batch of ketchup, green tomato relish, or anything else that takes your fancy by cutting back on the sugar, adding vinegar, and letting your imagination run wild!
Step-by-step making green tomato jam
To make a sweet and tangy delight that will leave you wanting more, let’s explore the world of green tomato jam. I’ll be your tour guide as we go through each process, offering my advice and suggestions to make the jam as tasty as it can be. So let’s get going!
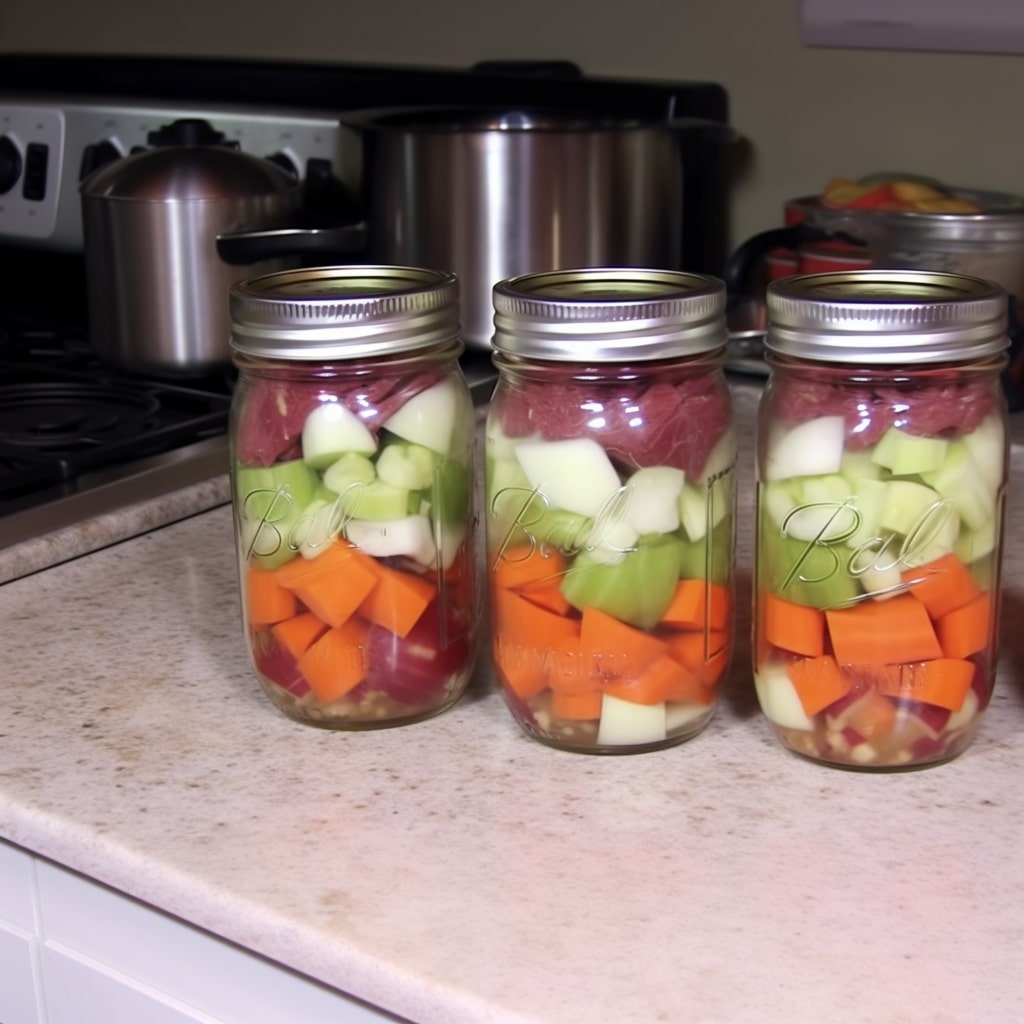
If we want to preserve the jam, let’s gather our ingredients and prepare our water bath canner first. The cooking process will be easier and more fun if everything is prepared and arranged.
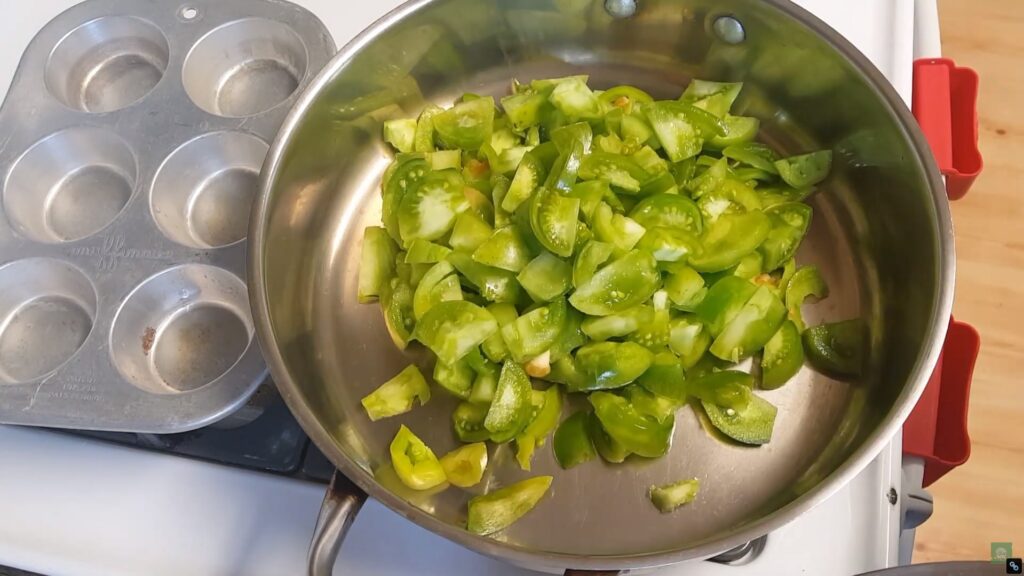
Let’s core and cut the tomatoes in half using a sharp serrated paring knife or another favored sharp knife. At this point, don’t worry about precision; later, we’ll roughly slice them.
Source: Simple Perrydise life!
You can choose to chop the tomatoes with a knife or a food processor. For a chunkier jam, I enjoy the tactile pleasure of hand-cutting. However, a food processor works just as well if you’re pressed for time. Don’t overpurée the tomatoes, either; we want some texture in our jam.
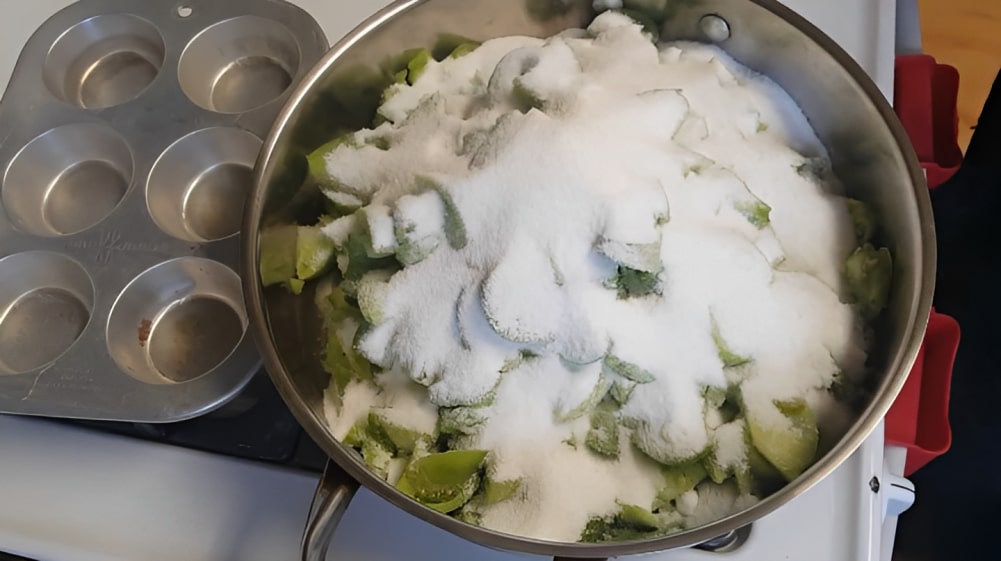
As you work, add the chopped green tomato preserves to a sizable heavy-bottomed stockpot, whether you’re hand-cutting them or using a food processor. This will serve as the basis for our savory jam.
Combining the components to improve the taste of our recipe green tomato jam is now the fun part. We’ll need 5 cups of granulated sugar, 1/8 teaspoon of diced pineapple, 1/4 teaspoon of cinnamon, and 1 lemon juice extract. I promise you that this mixture produces a mouthwatering flavor! To make sure the tastes work together flawlessly, stir everything together.
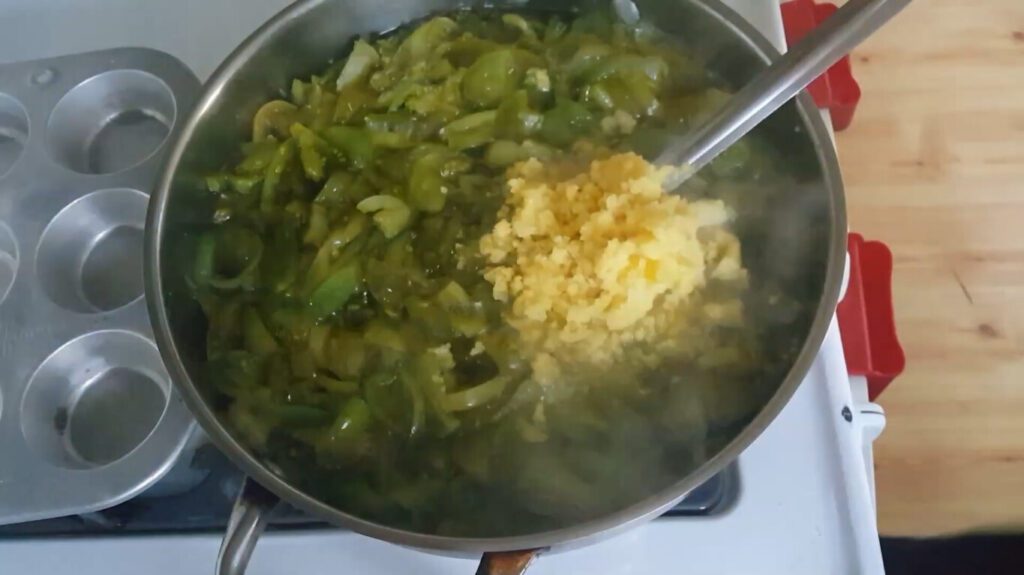
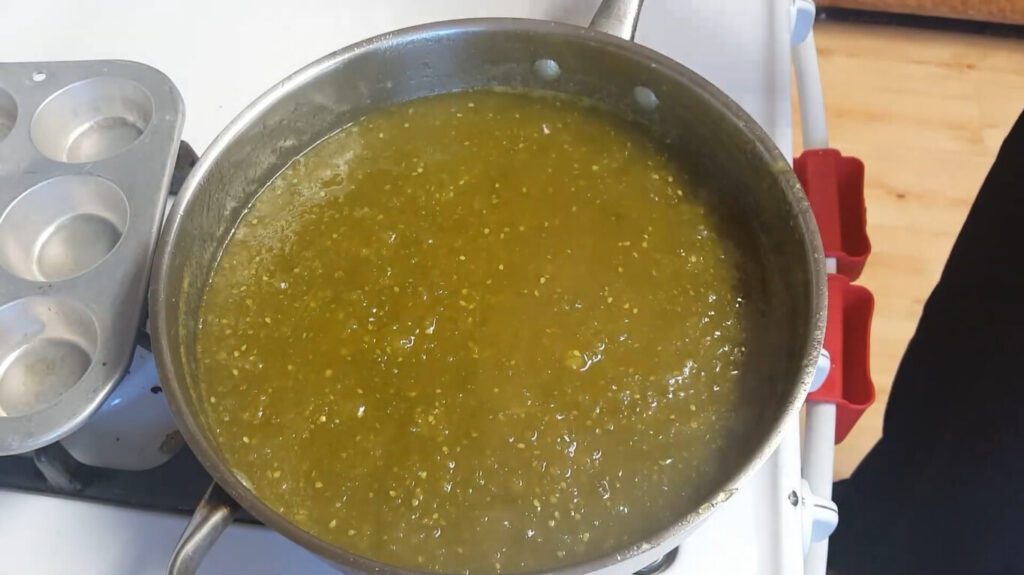
It’s time to boil the stockpot to a rolling boil over medium-high heat. This stage begins the jam-making process by infusing the ingredients. Watch the pot carefully and stir it occasionally to avoid burning. Boiling the mixture for around 25 minutes should result in a fragrant, gorgeously thickened slurry.
Set the heat to low and continue to simmer the green tomato mixture for an additional 30 minutes. Here, the green tomatoes’ natural pectins do their magic and perfectly thicken the jam. To avoid sticking and guarantee uniform heating, stir often throughout this period.
After my testing, I find that the jam thickens beautifully, but the cooking time may vary depending on the tomatoes’ moisture content. If the jam still seems watery after 30 minutes, keep simmering until it reaches your desired consistency. Trust your instincts—you’ll know when it’s just right.
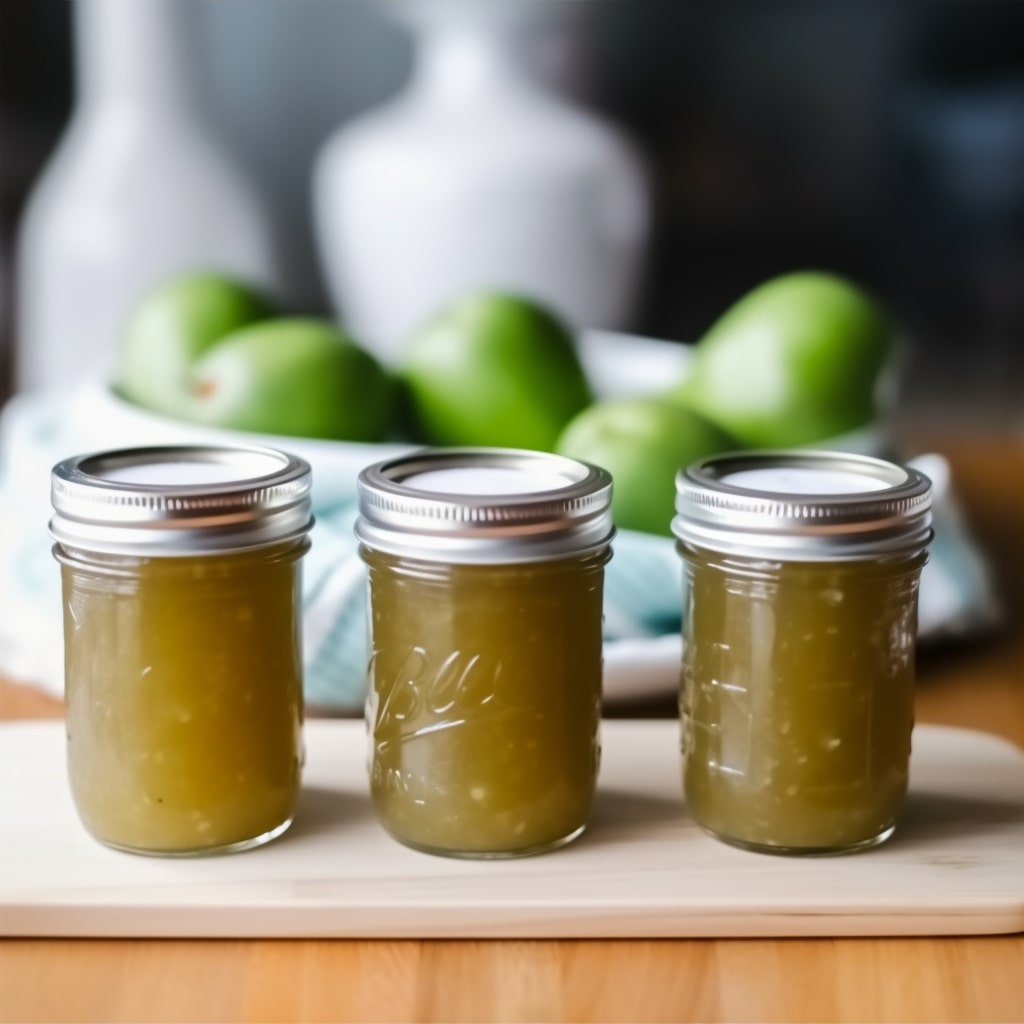
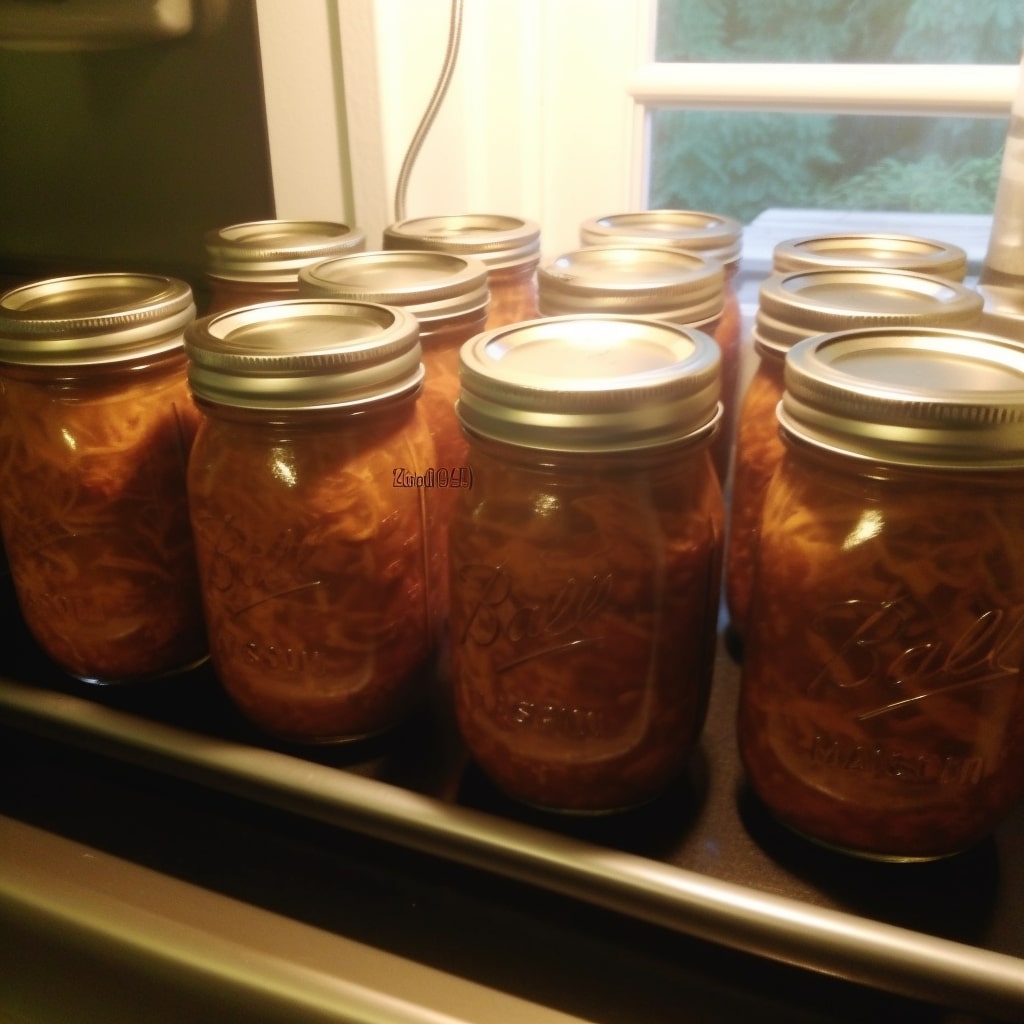
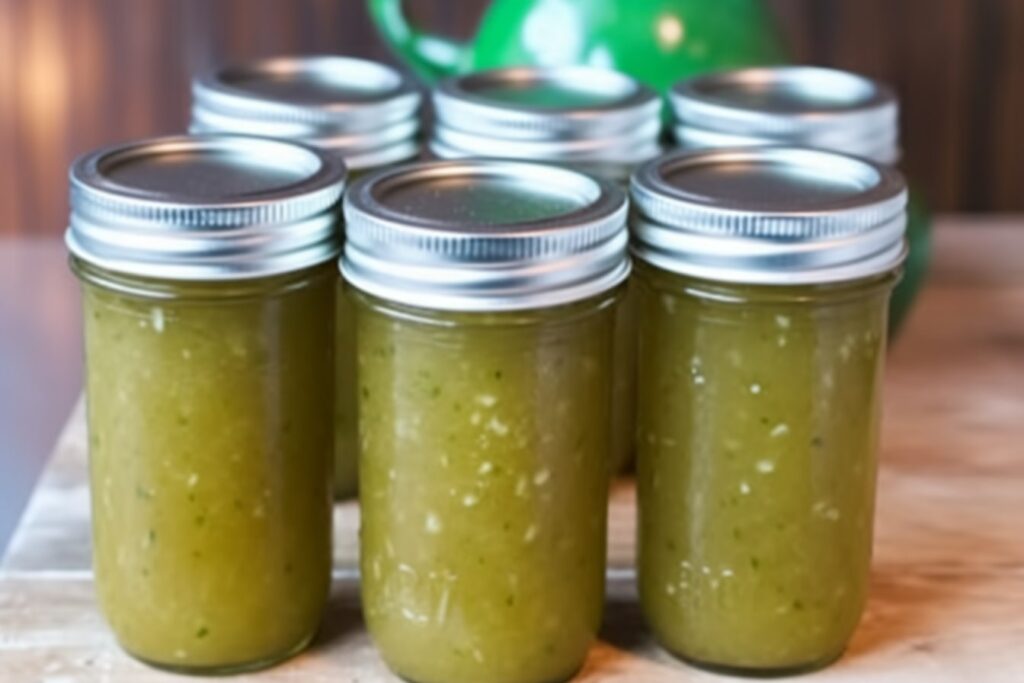
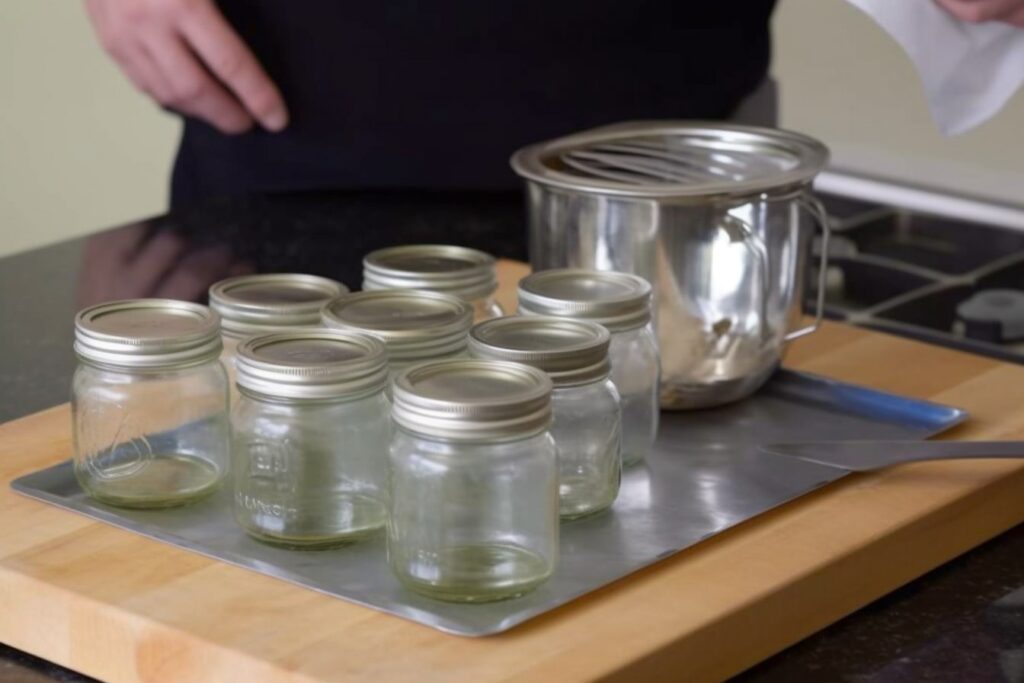
Remove the cinnamon stick, if you used one, and turn off the heat when the jam has attained the appropriate consistency. The jam has to be decanted into hot, sterile jars now. To store that handmade deliciousness, I advise using 4 (1-pint) or 8 (1/2-pint) jars.
Remove any trapped air bubbles in the jars to guarantee an airtight closure. Break the bubbles apart with a plastic knife or a chopstick. If extra jam is required to keep the 1/4-inch headspace necessary for effective sealing, add it.
To guarantee a clean seal, wipe the rim and sides of each jar with a clean cloth. Apply a two-part canning lid and firmly screw it on with your fingertip. By doing this step, you can be confident that your jam will remain tasty and fresh for several months.
You may save the jam using a hot water canner or keep it simple and store it in the refrigerator as a refrigerator jam (best consumed within 2 weeks). If you decide to preserve as water bath canning, follow the instructions to properly process the jars so you may use your green tomato jam all year.
Canning green tomato jam
Let’s start by discussing how acidic tomatoes are. Tomatoes are frequently regarded as “high acid” fruits, but from my experience, they require a little more assistance when canning to assure safety. This is where the recipe’s inclusion of lemon segments comes in. I’ve tried a few various approaches, and I’ve discovered that adding lemon slices increases the acidity of the jam while also giving it a delicious lemony edge.
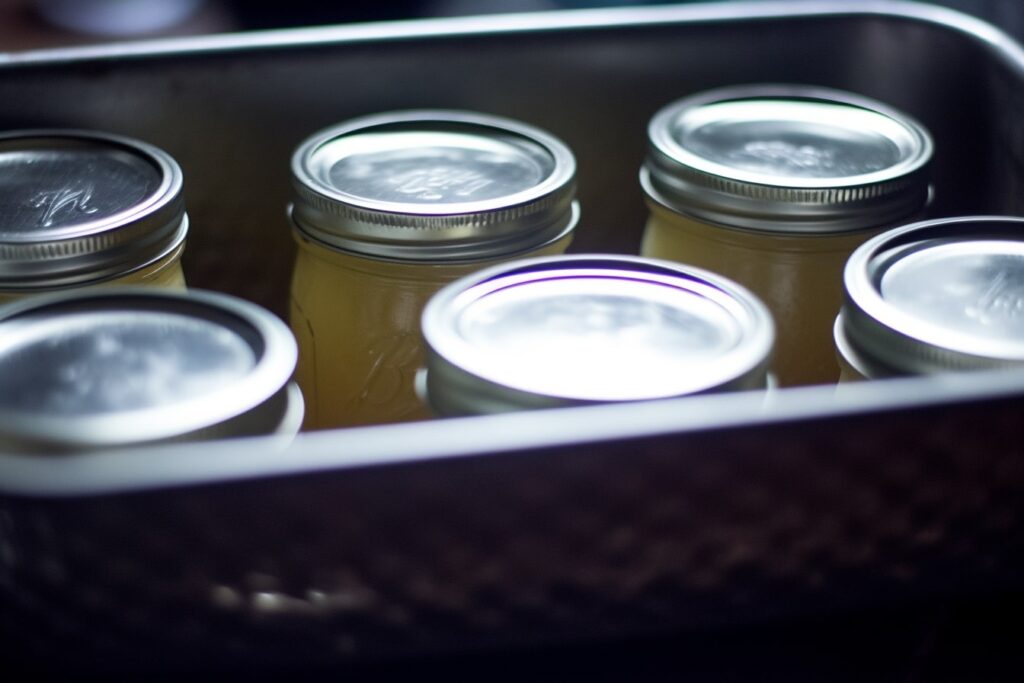
It’s time to place the green tomato jam jars in a hot water bath canner that has been set up. We want to make sure that at least an inch of hot water covers them completely.
Here’s a clever tip I learned: mix the water with 2 teaspoons of white vinegar. According to my tests, this optional step helps descale hard water and gets rid of tiny particles that would otherwise accumulate on the canner or the jars. It’s a quick and easy approach to keep your canning equipment in good shape and clean.
It’s time to process the jars when the water returns to a boil. The processing time, 20 minutes, is the same whether you’re dealing with pints or half pints. My experience tells me that the best way to assure precise timing is to set a timer. To create the ideal texture and maintain the flavors of the green tomato jam, this step is essential.
After the timer sounds, turn off the heat and give the jars another five minutes in the hot water. This step is crucial because, in my experience, it helps the jam to settle and guarantees a more uniform texture. Additionally, it adds to the excitement before you reveal your delectable masterpiece.
It’s time to take the jars out of the canner when the five minutes have passed. I usually advise carrying out this task with a jar lifter. It not only increases safety but also makes it simpler to handle hot jars. I assure you that protecting your fingertips from unintentional burns is a smart choice!
Give each jar at least 1 inch of space once you have properly set them on a clean surface. This promotes adequate ventilation and lessens the risk of contact-related damage. My own experiences have taught me that taking a little more care during this phase can significantly extend the shelf life of your canned foods.
Allow the contents to reach room temperature now. Normally, this takes twelve hours. Although the wait may seem long, trust me – the payoff is worthwhile! I advise avoiding the urge to open the jars during this period. Let them cool naturally to allow the flavors to mingle and develop.
Check the seal on your jars after the chilling process is finished. To guarantee the safety and freshness of your green tomato jam, you must complete this step. My personal research has shown that tightly sealed jars will have a slightly concave lid that is rigid when squeezed. There’s no need to freak out if any jars you find aren’t sealed. Just put them in the refrigerator so you can start eating them right away.
It’s best to take the band off of the sealed jars. You may then reuse them for further canning tasks. Additionally, it makes your pantry appear more efficient and tidy. This simple procedure has proven to be extremely useful, enabling me to stock up on a range of canned products without amassing an excessive number of bands.
Finally, keep your flawlessly sealed green tomato jam away from direct sunlight in a cold, dry location. This guarantees that your tasty creation will last as long as possible. In my experience, properly canned and sealed jars will remain in good condition for 12 to 18 months when stored in the pantry. Imagine how wonderful it would be to indulge in a taste of summer even in the chilly winter months!
Tips for Making Green Tomato Jam
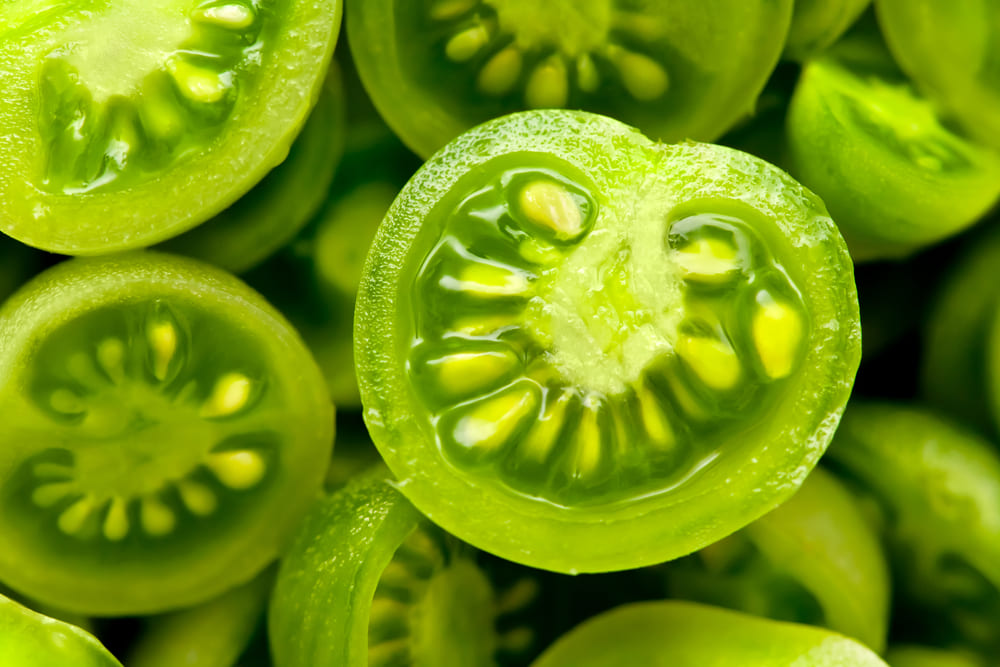
First and first, it’s important to choose the correct tomatoes. For the finest texture and flavor in your jam, choose firm, unripe green tomatoes. Avoid using tomatoes that are too ripe or too soft since they won’t hold up properly during cooking. You can trust that this process lays the groundwork for a wonderful jam.
Add a tablespoon of grated ginger and a couple of pinches of cinnamon to your green tomato jam if you want to make it even better. These additives can give the dish a tasty twist and improve the taste profile overall. It’s remarkable how a little ginger and cinnamon can elevate a basic jam to a level of outstanding excellence.
You can modify the recipe’s sugar content to suit your personal preferences. Feel free to slightly increase the sugar if you have a sweet craving. Keep in mind that this is your jam, therefore it should satisfy your own taste preferences. Therefore, don’t be scared to experiment and discover the ideal sweetness ratio.
Texture is important, too! Use a food processor or an immersion blender for a smoother consistency. After the mixture has been cooked, combine it to remove any bigger tomato chunks and give it a silky texture. You’ll be grateful for the silky experience on your taste senses!
It’s crucial to sterilize your jars properly in order to protect your jam’s lifespan and safety. Be sure to sanitize the jars and the lids completely before filling them with your delectable product. This procedure safeguards against contamination and lengthens the jam’s shelf life. Additionally, it’s always gratifying to see your lovely jars arranged in a row, prepared to be savored for months to come.
Here’s an original twist: vanilla! Even though it isn’t a typical component, a tiny quantity of vanilla bean or extract may give green tomato jam a special touch. Vanilla’s sweet and fragrant flavor, which also has undertones of caramel and floral notes, can pleasantly improve the flavor profile. It’s worth a go, in my opinion, if you’re feeling daring.
Try using sugar-free Jello as a sweetener if you’re watching how much sugar you consume. Green tomato jam still has that delicious, jam-like consistency when made with sugar-free gelatin, although having less sugar in it. A win-win scenario exists!
Conclusion
With this green tomato jam recipe for canning, you can transform under riped tomatoes into a delightful spread that’s both sweet and tangy. Whether you opt for the classic recipes for green tomato jam or the old-fashioned twist, you’ll be treated to a unique flavor profile that adds a touch of freshness to your dishes. Enjoy the taste of summer all year round with homemade green tomato jam.
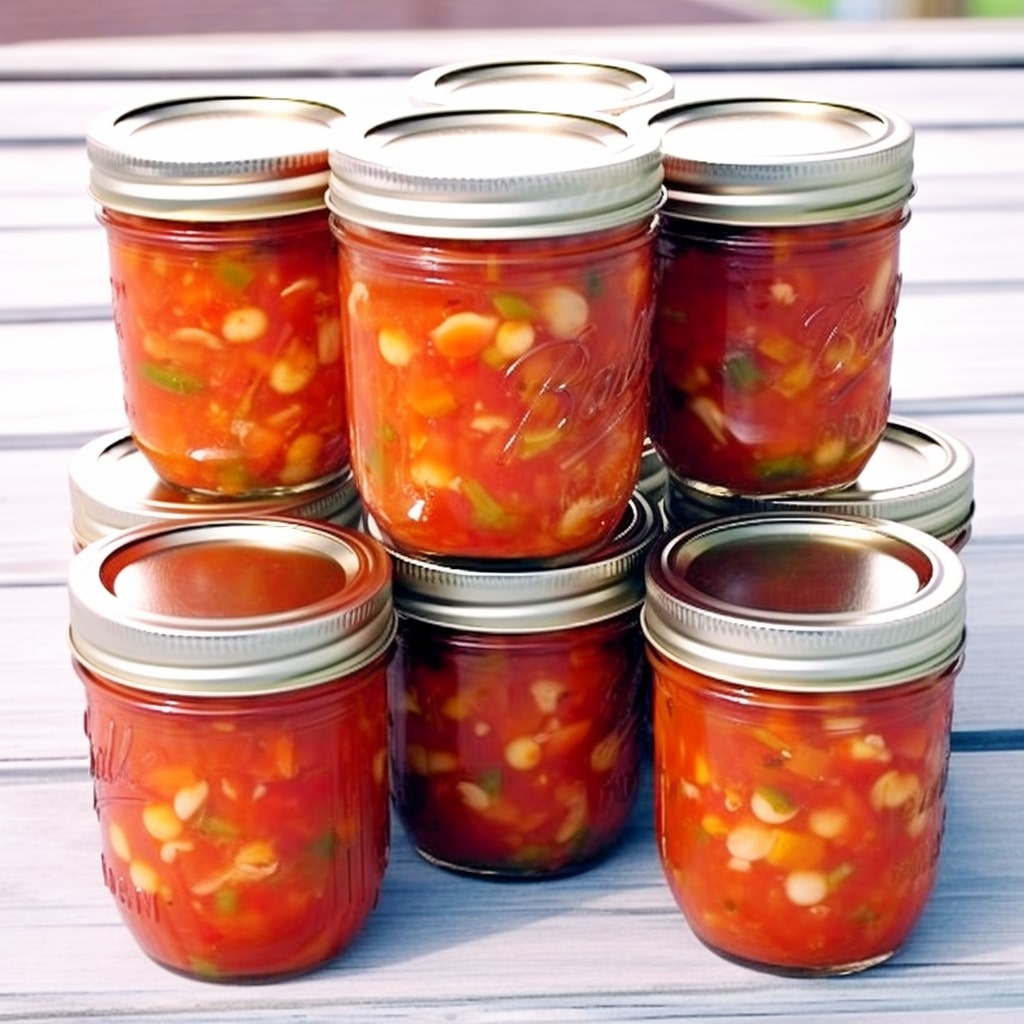
And in case you want to discover some dynamic jam canning recipe, we always got your back. Apron up and let’s explore available Manzanillanyc’s jam canning recipes:

Green Tomato Jam Recipe For Canning
Equipment
- 1 Water Bath Canner
- 6 Mason Jars
- 6 Canning Lids
- 1 Canning Kit
Ingredients
- 6 pounds of green tomatoes chopped (approximately 8 cups)
- 5 cups of granulated sugar
- 1/4 teaspoon of ground cinnamon
- 1/8 teaspoon of chopped pineapple
- 1 lemon deseeded and thinly sliced for juice extraction
Instructions
Making Green Tomato Jam
- Gather ingredients and prepare a water bath canner for preserving the jam. And core and cut the tomatoes in half and roughly slice the tomatoes.
- Choose to chop the tomatoes with a knife or food processor. Then, add the chopped tomatoes to a heavy-bottomed stockpot.
- Combine 5 cups of granulated sugar, 1/8 teaspoon of diced pineapple, 1/4 teaspoon of cinnamon, and 1 lemon juice extract. And stir everything together to improve the taste.
- Boil the mixture in the stockpot over medium-high heat for approximately 25 minutes.
- Reduce the heat to low and simmer for an additional 30 minutes. And keep simmering if the jam is still watery after 30 minutes.
- Remove trapped air bubbles and add extra jam if needed. Wipe the rim and sides of each jar. Apply a two-part canning lid and screw it on firmly.
Canning Green Tomato Jam
- Follow proper canning instructions if using a hot water canner. Add lemon slices to increase acidity and enhance flavor. Then, set up a hot water bath canner and ensure jars are covered with at least an inch of hot water.
- Mix water with 2 teaspoons of white vinegar to descale hard water and remove particles from canners and jars. Now, process jars in boiling water for 20 minutes, regardless of size.
- Set a timer to ensure precise timing for optimal texture and flavor. After that, let the jars sit in hot water for 5 minutes after turning off the heat.
- Leave at least 1 inch of space between jars on a clean surface for ventilation and to prevent damage. Then, allow jars to cool to room temperature for 12 hours to develop flavors.
- Check the seal on jars by ensuring the lids are concave and rigid when squeezed.
- Refrigerate unsealed jars for immediate consumption. And remove bands from sealed jars for reuse and organization.
- Store perfectly sealed jars in a cool, dry place away from direct sunlight. Properly sealed jars can last 12 to 18 months when stored in the pantry.
Notes
- Add lemon slices for acidity and flavor.
- Set up hot water bath canner; jars should be fully covered.
- Mix water with 2 tsp white vinegar to descale and remove particles.
- Process jars in boiling water for 20 mins.
- Use a timer for precise timing.
- Let jars sit in hot water for 5 more mins.
- Use a jar lifter for safe removal from the canner.
- Leave 1 inch space between jars for ventilation.
- Allow jars to cool at room temperature for 12 hours.
- Refrigerate unsealed jars for immediate use.