In a kitchen where the refrigerator is brimming with an abundance of vegetables, fruits, and various foods preserved through freezing, we present a truly unique addition to your pantry. Our pressure canning shrimp recipe is unlike any other, offering a delightful and innovative way to preserve and savor the delicate flavors of succulent shrimp.
Through pressure canning, we crafted a dish that ensures the long-lasting freshness of shrimp and infuses it with a medley of complementary flavors. Whether planning a gourmet meal for friends and family or simply seeking a quick and delectable treat, the pressure-canning shrimp will become your go-to delicacy.
Try our Pressure Canning Shrimp recipe today and discover a new culinary delight that will leave your taste buds craving more.
Preparing Ingredients for Canning Shrimp
Considering which types of shrimp to use, the ingredients and more tips to prepare for canning? Stay tuned for more details in this section below:
Fresh or Pre-Cooked Shrimps?
As someone who has had their fair share of shrimp-tastic experiences, I’m excited to share my thoughts.
Both fresh and pre-cooked shrimps have their merits, but if conditions allow, I highly recommend opting for fresh shrimps. Here’s why:
- Texture Matters: Texture is an important aspect of shrimp enjoyment. Heat treatment is used in the canning process for pre-cooked shrimp, which might have unintended repercussions. Imagine biting into a mushy, overcooked shrimp—not exactly the delectable feeling we want.
- Take Control of Your Cooking: Using fresh, raw shrimp gives you greater culinary control over the canning process. You can choose how to cook them to preserve the shrimp’s delicious texture and exquisite taste.
“But isn’t the convenience of pre-cooked shrimp unbeatable?” you may be wondering. Absolutely! Pre-cooked shrimp may help you save time in the kitchen and are ideal for fast dinners. However, when flavor and texture are prioritized, the extra work with fresh shrimp is well worth it.
Fresh shrimp provide limitless options if you’re brave and want to try new dishes. Fresh shrimps allow your creativity to show in the kitchen, from delectable scampi and spicy shrimp tacos to aromatic stir-fries. Experimenting to find the ideal shrimp dish is quite gratifying!
Of course, everyone’s tastes differ, and there is no one-size-fits-all solution. Fresh shrimp, however, captured my heart after much trial and investigation due to their variety and capacity to take meals to the next level.
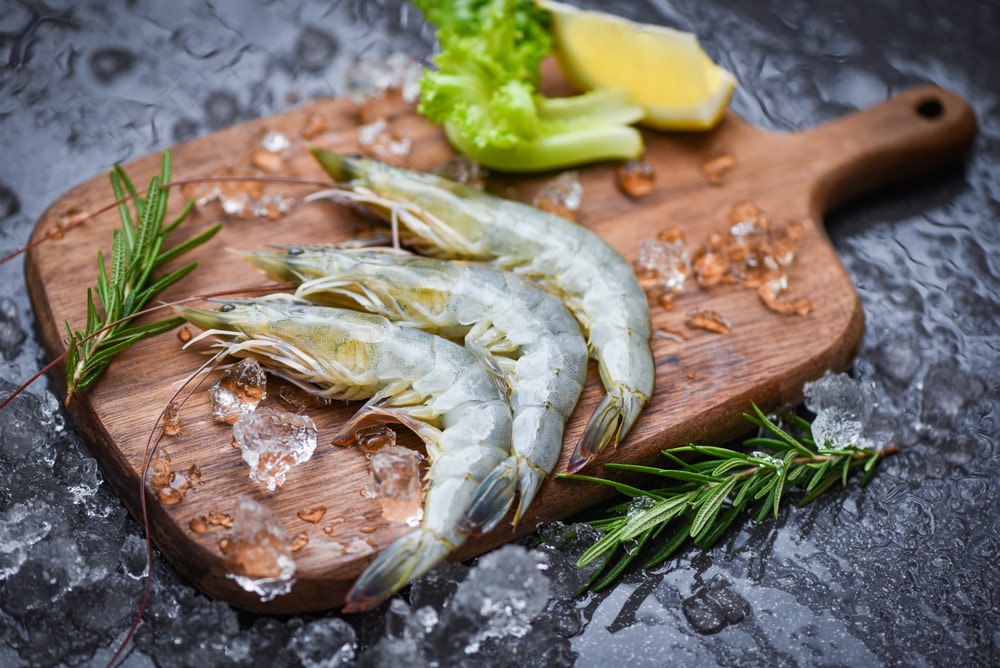
Some kind of shrimps to be considered for pressure canning
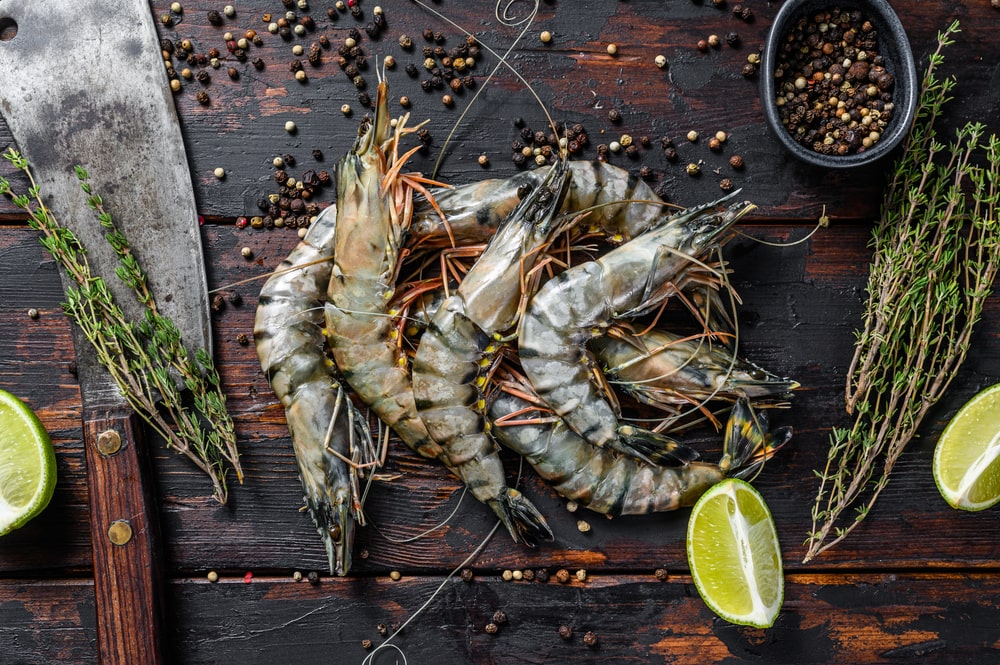
According to my research and expertise, Tiger Shrimp and Pink Shrimp are good alternatives for preserving in jars using a pressure canner. Let me explain why!
Let’s start with the Tiger Shrimp. Tiger Shrimp are my favorite since they add a delicious touch to canned shrimp preserves. They provide a distinctive touch to any meal you cook with their distinct design on the shells and somewhat stronger flavor.
Tiger Shrimp will not disappoint in a refreshing salad or a delicious stir-fry with rice. Their flavors make them an excellent choice for individuals wishing to experiment with new flavor aspects in their canned shrimp treats.
Pink Shrimps are appealing due to their gentle, sweet taste and delicate texture. What I adore about Pink Shrimp is their versatility; they are widely available and commonly used in various shrimp dishes. When you choose Pink Shrimp for your pressure-canned jar, ensure it’s ready to elevate any meal you have in mind. From salads to stir-fries, pasta to rice dishes, Pink Shrimp will make your culinary creations shine.
To enjoy a diverse and delicious shrimp medley, consider combining Tiger Shrimp and Pink Shrimp in your pressure-canned preserves. By doing this, you can create a captivating blend of flavors catering to various tastes. Imagine the joy of opening a jar filled with a delightful mix of visually appealing Tiger Shrimp and subtly sweet Pink Shrimp. It’s like having a treasure chest of culinary wonders in your kitchen!
Ingredients for Pressure Canning Shrimp
- 2-gallon water
- 2 cups salt
- 4 tablespoons salt
- 2 cup vinegar
- 5 pounds shrimp
- stock pot
- large bowl
- Funnel
- Canning jars
- Paper towel
- Jar lifter
- Kitchen towel
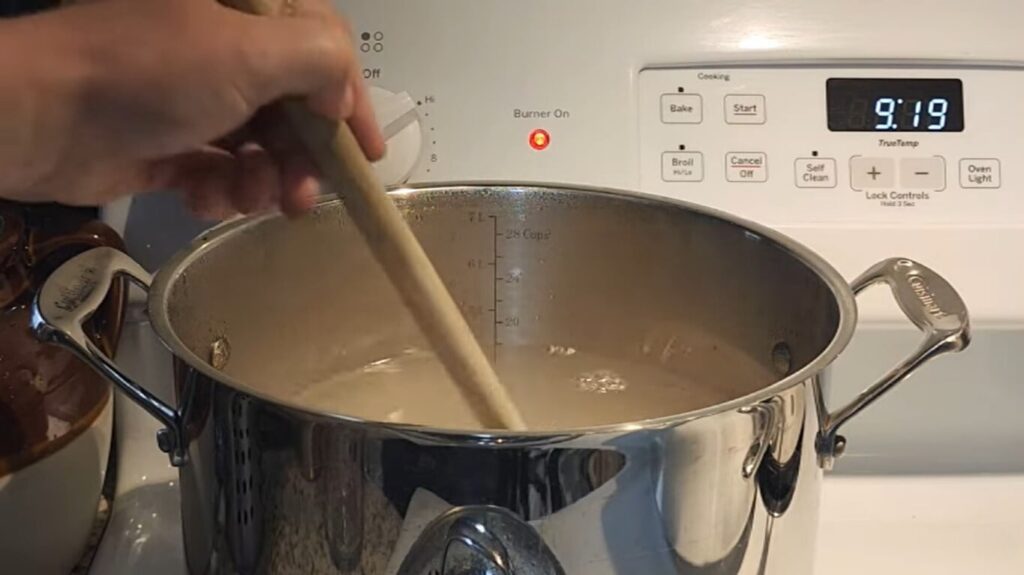
We begin by adding 2 liters of water. When I started canning, I questioned the need for so much water. This amount helps to maintain a steady climate within the canning pot and gives the shrimp enough room to cook evenly in the brine.
It may seem like a lot, but we’ll need 2 cups of salt for the brine and 4 tablespoons of salt to add to each jar. Trust me; this combination works wonders! The brine infuses the shrimp with a delicious flavor, and that extra pinch of salt in each jar ensures the taste is just right when you finally pop them open.
I’ve learned through researching several recipes that the key to giving the canned shrimp that lovely tanginess is to add 2 cups of vinegar to the mixture. Additionally, it’s essential to maintain the appropriate degree of acidity to guarantee the safety of the canned product.
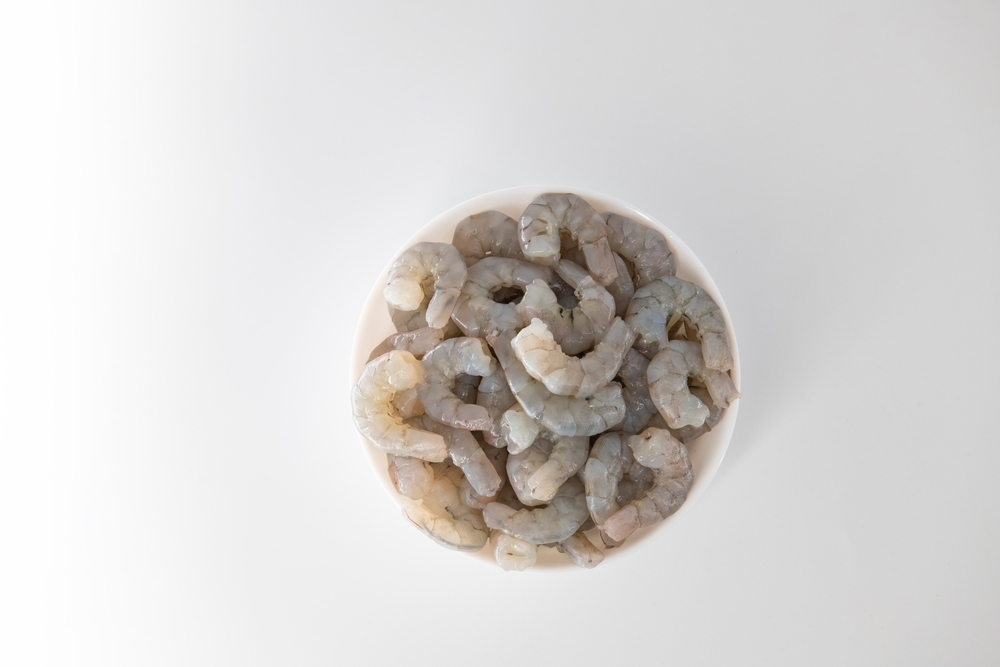
Let’s talk about the main attraction: 5 pounds of fresh shrimp. I made the error of using frozen shrimp when I first tried pressure canning, and the results were noticeably different. You won’t regret choosing fresh shrimp, so heed my advice! The resulting product cannot compare to fresh shrimp’s texture or flavor.
We’ll need key tools to complete the job quickly and effectively. We use our reliable stock pot to boil the water and make the brine. And trust me, the huge dish is important when combining the shrimp with the brine since it eliminates any needless mess!
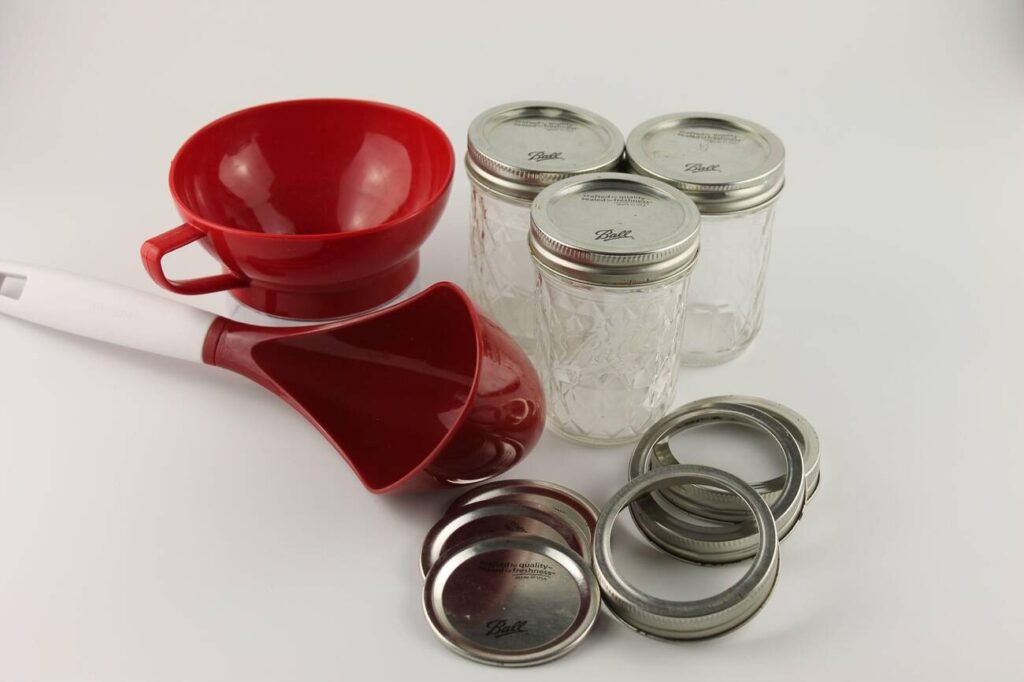
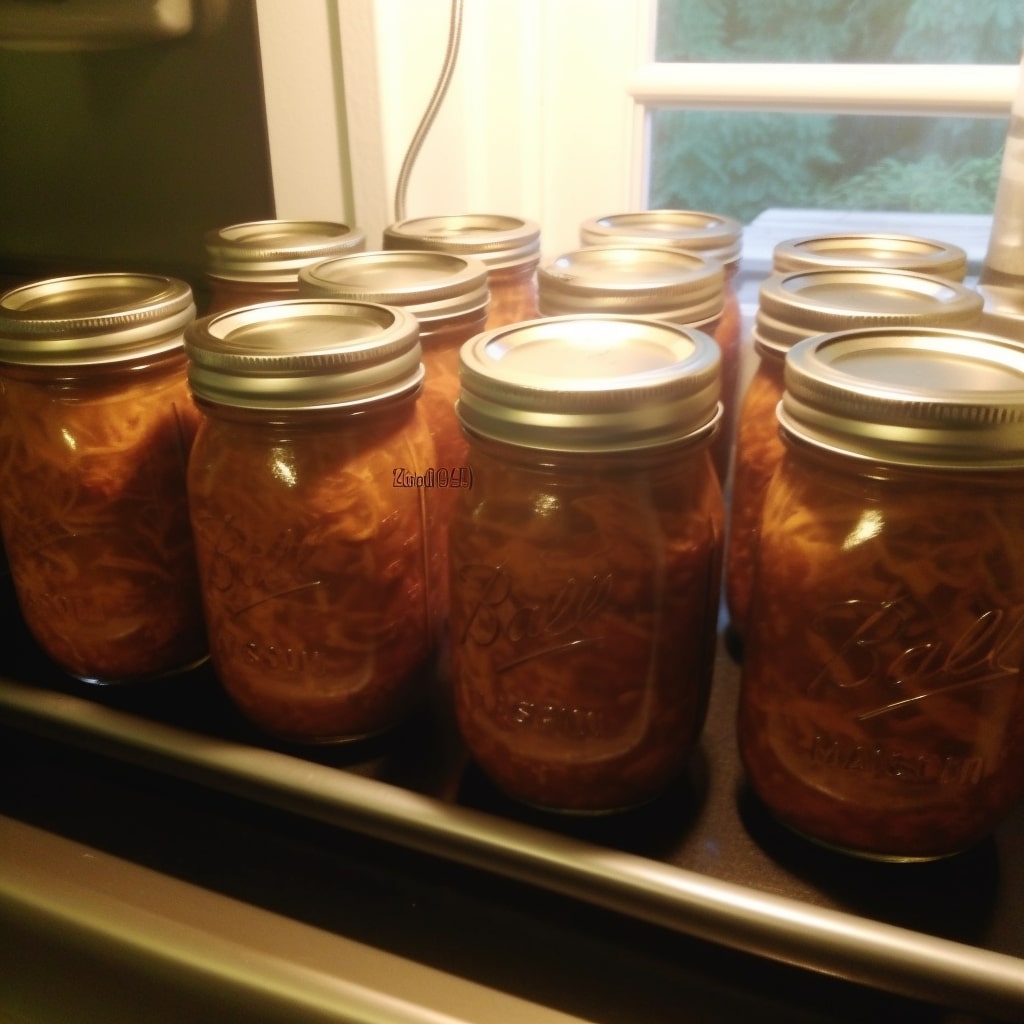
Let’s now discuss canning jars. We know how annoying it may be if jars break when canning. The use of jars made expressly for pressure canning is essential. I had to learn this the hard way, but after I started using the right canning jars, canning was a lot more fun.
Always keep safety in mind when handling heated objects. A jar lifter is, therefore, an urgent necessity. While safely removing those hot jars from the canning pot, it protects your hands.
Based on my tests, I can confidently declare that pressure-canning shrimp is a great joy. Shrimp that are succulent and have all of their tastes intact after that. Knowing that I have produced a delectable handmade pantry staple makes seeing those nicely sealed jars fulfilling.
Shrimp Brine for Pressure Canning
The brine is vital to maintaining and increasing the flavor of the delicious crustaceans when pressure-canning shrimp.
Let’s start by discussing the three key ingredients of our shrimp brine: water, vinegar, and salt. Vinegar, a great acidifier, is the main player in this scenario. By producing a high-acid environment, this simple approach enables pressure canning and ensures the security of your canned shrimp.
I can imagine what you’re wondering: will the vinegar flavor of my shrimp overpower it? Without a doubt! To prevent the vinegar from overpowering the shrimp’s natural flavor, we’ll be sure to use the proper quantity. Maintaining the beloved seafood flavor while guaranteeing its safe storage is the aim.
How do we then create this shrimp brine that achieves the ideal balance? Let me share the results of my kitchen research. Getting the ratios correct is crucial!
You might try this easy and delicious recipe for shrimp brine:
Ingredients:
- 4 cups of water (preferably filtered)
- 1 cup of white vinegar (5% acidity)
- 1/4 cup of non-iodized salt (pickling or canning salt works best)
Instructions:
- In a saucepan, combine the water, vinegar, and salt.
- Bring the mixture to a gentle simmer, stirring occasionally until the salt fully dissolves. This step ensures that the flavors meld together beautifully.
- Let the brine cool to room temperature. Take your time with this part; patience pays off regarding flavor development!
Your shrimp brine is now prepared to start working its magic. Let’s spice things up a bit further by adding some intriguing flavors and spices while we’re still at it! The brine may transfer those tastes directly into the shrimp, which is one of the benefits of pressure canning.
Here are some wonderful additions you can explore:
- Fresh garlic cloves for a subtle yet delightful kick.
- Zesty lemon or lime zest to brighten up the taste.
- A pinch of red pepper flakes for a gentle hint of heat.
- Bay leaves, thyme, or dill for an aromatic touch.
Remember that you may always experiment with spices to create your ideal combination. Based on my tests, I suggest adding these additional items to the brine while it’s still warm. This makes the flavors blend and create a delectable brine that perfectly accentuates your shrimp.
Follow the pressure canning guidelines for your specific canner to ensure safe and proper processing. When done, you’ll have jars of delicious, shelf-stable shrimp ready to be enjoyed whenever you please.
Step-by-step Instructions on Canning Shrimp Recipe
Let’s delve deeper into each step and add a personal touch to the instructions to make this canning journey even more engaging and enjoyable!
Source: Youtube @ Homestead Corner
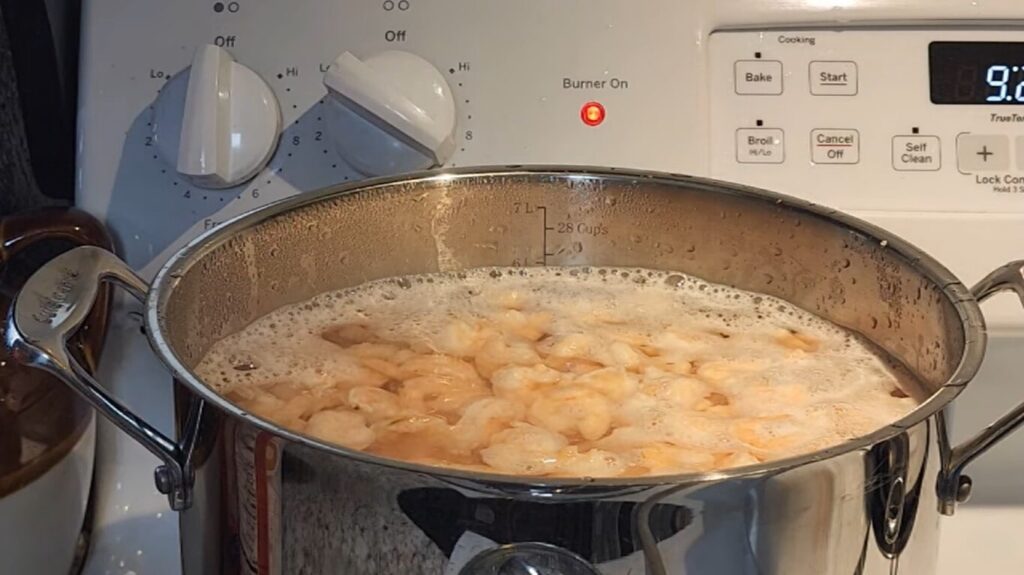
- Step 1: Imagine that you will start on a shrimp canning expedition and have your pot ready. Consider the wonderful tastes we will impart to these tiny crustaceans as you add the water to the saucepan. A dash of vinegar and a sprinkling of salt are vital ingredients enabling our shrimp to reach their full potential.
- Step 2: While we wait for that water to reach its boiling point, let’s take a moment to appreciate the process. Washing and draining the shrimp might seem like a simple step, but it’s crucial. We want to start with the freshest canvas to showcase those delicious flavors.
- Step 3: Okay, it’s time! Gently lower those shrimp into the bubbling water, and let them dance and twirl for 10 minutes. Think of this as their spa session – they’re all pampered and perfectly cooked.
- Step 4: Now comes a swift move – from the pot to a bowl of cold water. It’s like a refreshing dip in the pool after that spa treatment. This quick transfer halts the cooking process, preserving the shrimp’s tender texture.
- Step 5: Peel those shrimp shells off to reveal the delectable flesh. We are one step closer to enjoying that delicious, ready-to-eat shrimp as we take out the shells.
- Step 6: Let’s talk about safety while the shrimp continue to boil. Clean, disinfected jars and lids are crucial for successful canning. Think of it as creating a clean canvas for our masterpieces!
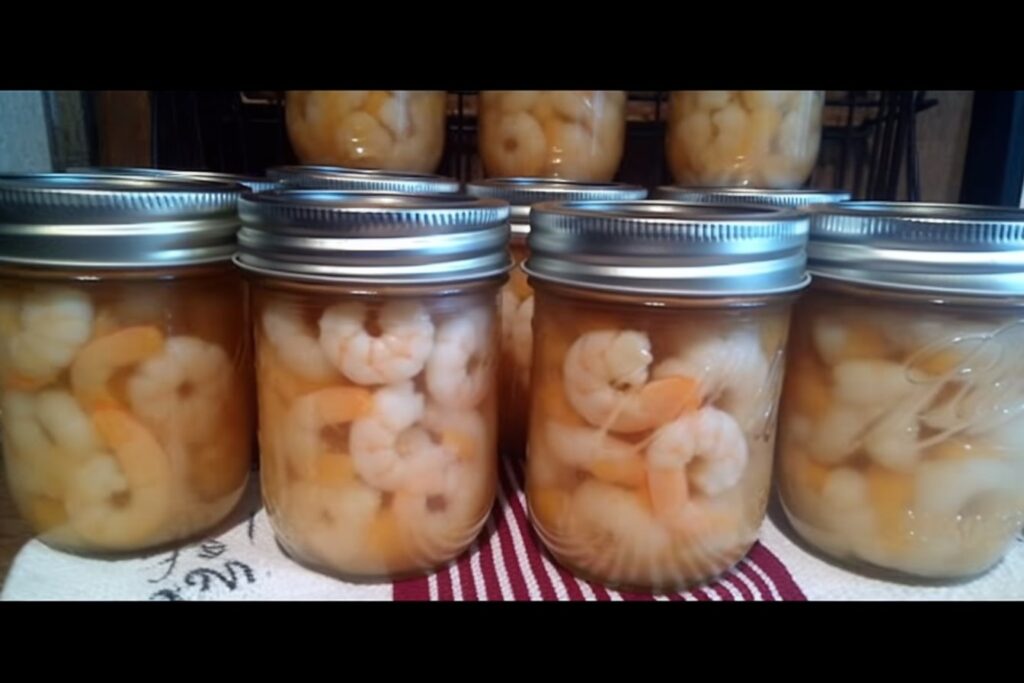
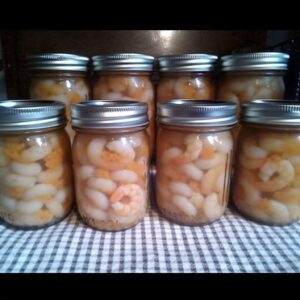
- Step 7: Here’s where the magic happens! With the help of a funnel, we lovingly pack our jars with these tasty gems and their savory boiling water. It’s like creating little pieces of edible art, of course.
- Step 8: Before signing the contract, we must ensure everything is ideal. We’ll eliminate any remaining air bubbles to ensure our shrimp-filled jars are sparkling. And before putting on their lids and rings, cleaning the jar rims is like loving them.
- Step 9: The pressure canner resembles a smoky, mystical cauldron about to perform preservation magic. We can’t help but think of the delicious dishes we’ll make with these canned shrimp while we wait for the timer to run out.
- Step 10: The crucial step is removing those lovely jars from the canner and setting them on the counter. Don’t they resemble culinary treasures? Our ability to can food is evident from the brilliant colors and delicious aroma.
From my experience, canning shrimp is an art form and a labor of love, not merely a means of preservation. We are getting closer to being able to eat delicious shrimp meals all year long with each step we take.
As I experiment with various approaches and recipes, I discover that the finest results come from following a step-by-step procedure similar to a well-planned dance. Each jar contains the spirit of the sea, creating a symphony of tastes.
So, my fellow kitchen explorers, I advise using a little ingenuity while embarking on this canning voyage. Share your creations with loved ones, proudly label your jars, and rejoice in the delight of home-cooked food.
Process Pressure canning shrimp
As we explore the process of pressure-canning shrimp, I’ll share my perspective and some personal insights to make it a rewarding experience for you.
Step 1 – Peeling and Packing the Shrimp
Alright, my fellow seafood enthusiasts, here we go! First, prepare those cooked fresh shrimp for their journey into the jars. Peel them and pack them, leaving that all-important 1-inch headspace. Why the headspace, you ask? It’s like giving the shrimp some breathing room during the canning process, ensuring the best results.
Step 2 – Taking the Brine
Now, you can decide based on your taste preferences or dietary needs. If you’re like me and love a burst of flavor, go for the hot brine you prepared before. But if you’re watching your salt intake, fret not! You can use boiling water instead and let the natural shrimp goodness shine through.
Step 3 – Debubbling and Sealing
Alright, folks, this step is like playing the magician in the kitchen! Make those air bubbles disappear with a quick flick of your spatula or bubble remover tool! Trust me; you don’t want any hidden bubbles causing mischief in your jars later. And once that’s sorted, securely place the lids and rings on the jars – we don’t want any leaks, do we?
Step 4 – Preparing the Pressure Canner
It’s time to introduce our culinary wizard – the pressure canner! Adding about 3 quarts of hot water to the canner will help create the perfect environment for canning magic. So, carefully pop those packed jars inside the canner, and let the excitement build!
Step 5 – Venting and Heating
This part is like giving the shrimp a warm-up before their big performance. Lock the canner lid, crank up the heat, and let it vent for 10 minutes. Think of it as a little countdown to deliciousness. We’re ensuring the canner is all set and ready to work its magic!
Step 6 – Processing Time and Pressure Levels
Here comes the crucial part, my friends! This is where timing is everything. For those pint and half-pint jars, we’ll let them party in the canner for a delightful 45 minutes. And while they’re inside, the pressure gauge should read 11 PSI (if you’re using a dial gauge) or 10 PSI (for the weighted gauge folks). Don’t worry; it’s all about finding the right balance.
Step 7 – Patience is Key
Now, we come to the waiting game, my friends. I know it can be tough to resist peeking inside the canner, but patience is essential here. As the pressure gradually drops to zero, our shrimp are perfectly sealed.
Step 8 – Removing the Jars
Phew, the waiting is over! Time to unlock that canner lid and unveil the treasures within. But, hey, safety first! Be sure to direct the steam away from your face – we want you smiling throughout this whole process. And once it’s safe, carefully remove those precious jars.
Step 9 – Cooling and Labeling
We’re in the home stretch, my friends! Place those beautiful jars on a cutting board, and let them cool down like the culinary rockstars they are. Remember, patience pays off big time. And once they’re all sealed and cooled, it’s time to remove the rings, wash the jars, and give them a name and a date. Yes, let’s give credit where credit is due – those jars are now little-time capsules of shrimp perfection!
Some Dishes to use your homemade canned shrimp with
I’ve explored these recipes and found them delightful and easy to prepare. Let’s get cooking!
- Shrimp Salad: I must say, there’s something so refreshing and satisfying about combining those tender, flavorful canned shrimp with crunchy diced celery and onion. The magic happens when you toss it all together with creamy mayonnaise and a zing of lemon juice. The result is a burst of flavors that will make you crave this salad every chance. Trust me, serving it on a fresh, crisp lettuce bed or as a mouthwatering sandwich is an absolute game-changer!
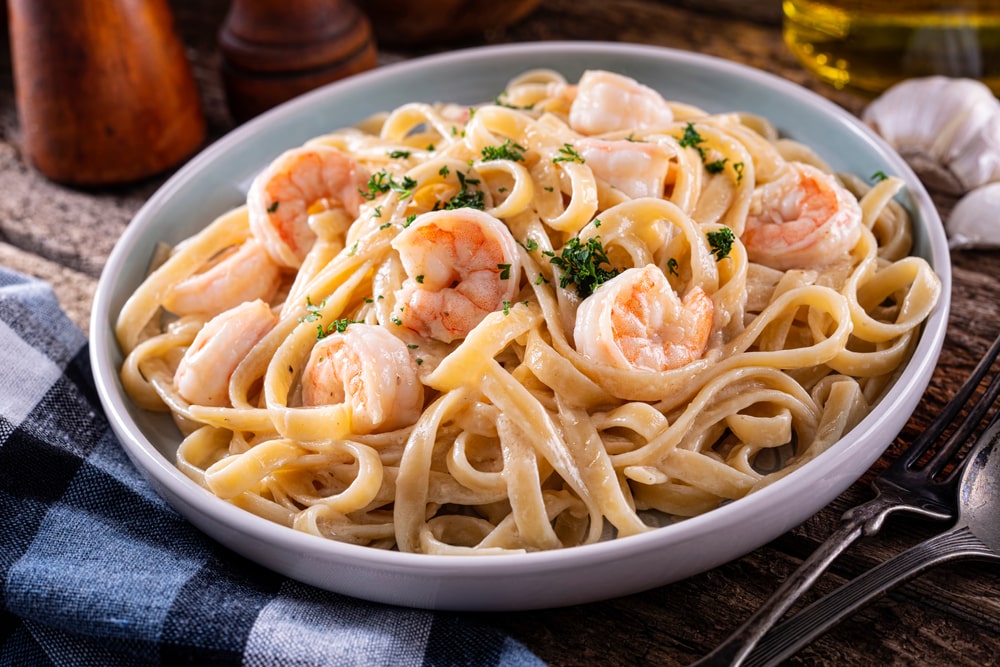
- Shrimp Pasta: One of my personal favorites! To make that beautiful scent, toss the luscious canned shrimp with cooked pasta, drizzle with olive oil, and sprinkle with chopped garlic. Toss some juicy cherry tomatoes and a handful of fresh herbs like basil or parsley to add flavor. Voilà! This is a fast and tasty shrimp pasta meal that will have you coming back for more.
- Shrimp Stir-Fry: Picture this: colorful bell peppers, vibrant broccoli, and crunchy snap peas dancing in the pan with those juicy canned shrimp. Oh, what a delightful sight! And the flavors? Divine! My go-to sauce for this stir-fry includes a harmonious soy sauce, ginger, garlic, and honey blend. It’s the perfect balance of savory and sweet, creating an irresistible dish that’ll have your taste buds singing in delight.
These dishes are not only easy to make but also versatile. You can experiment with different ingredients and spices to tailor them to your liking. From my experience, having canned shrimp on hand is a game-changer in the kitchen. It’s a fantastic way to add a burst of seafood goodness to your meals without the hassle of peeling and deveining fresh shrimp.
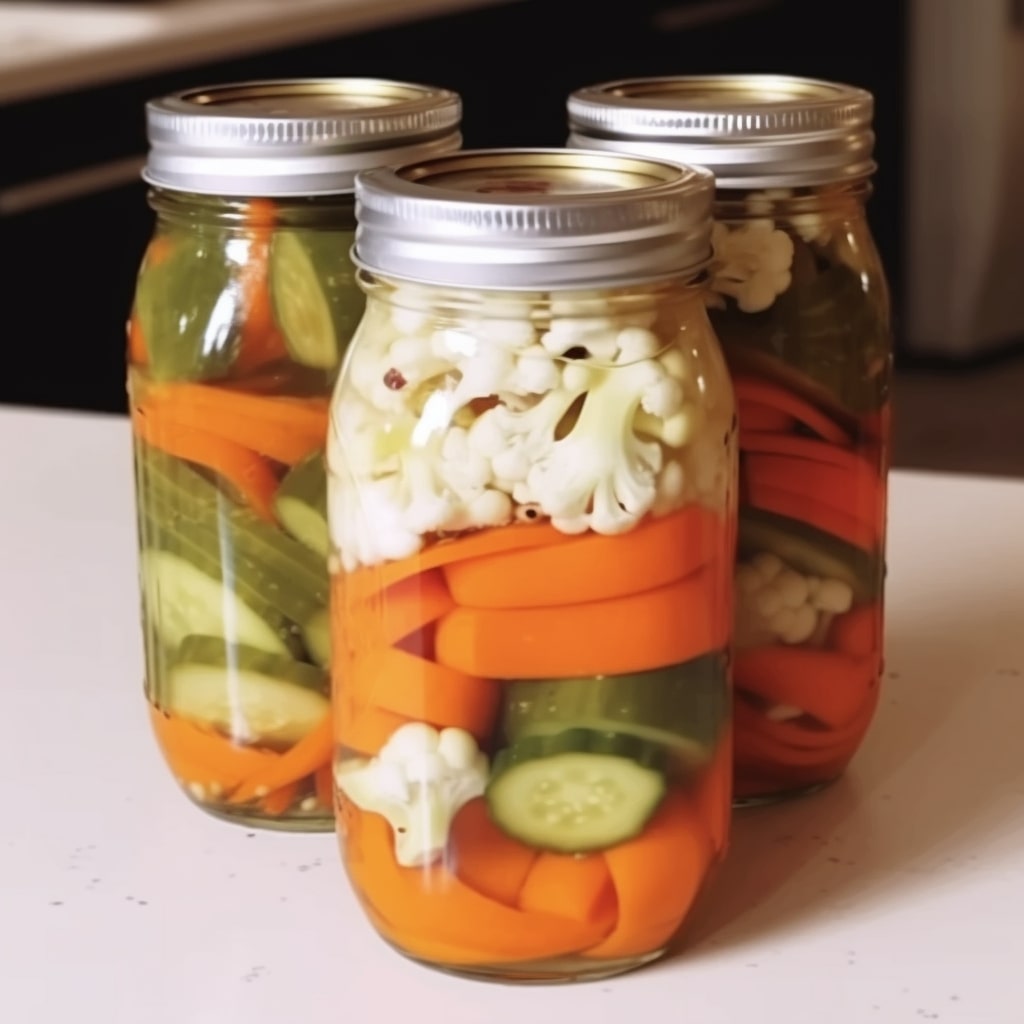
Pressure canner is such a brilliant invention, creating hundreds of ready-to-use or ready-to-process ingredients in jars, canning shrimp is just one of them. Since you have already interested in canning shrimp, I supposed lol, why not taking a look at some other interesting meal-in-jar recipes available at Manzanillanyc?
Pressure Canning Shrimp Recipe
Equipment
- Pressure Canner
- Stock Pot
- Large Bowls
- Funnel
- Canning Jars
- Paper Towel
- Jar Lifter
- Kitchen Towel
Ingredients
- 2 gallon water
- 2 cups salt
- 4 tablespoons salt
- 2 cups vinegar
- 5 pounds shrimp tiger or pink shrimp would be really tasteful
Instructions
Preparing Shrimps for Canning
- Prepare the pot; add water, vinegar, and salt as brine for flavor.
- Wash and drain the shrimp for a fresh start.
- Boil the shrimp for 10 minutes like a spa session.
- Transfer to cold water to preserve tenderness.
Pressure Canning
- Peel the shrimp and pack them into jars, leaving 1 inch of headspace.
- Ladle the hot brine over the shrimp. If you’re watching your salt intake, use boiling water and omit the salt.
- Remove any air bubbles and add brine to maintain the 1-inch headspace.
- Wipe each jar rim with a warm wet washcloth dipped in vinegar.
- Place the lid and ring on each jar and hand tighten.
- Add hot water to your pressure canner as per the manufacturer’s requirements (often 3 quarts).
- Place the hot jars in the pressure canner, lock the lid, and put the canner on high heat, bringing it to a boil.
- Let the canner vent for 10 minutes, then close the vent and continue heating to achieve 11 PSI for a dial gauge and 10 PSI for a weighted gauge, or according to your elevation.
- Process both pints and half-pints for 45 minutes.
- Once the canner is at zero PSI, remove the lid, deflecting the steam away from your face.
- Allow the canner to sit undisturbed for 10 minutes before removing the jars from the canner.
- Place the jars on a cutting board and allow them to cool undisturbed for at least 8 hours or overnight.
- Once all the lids have been sealed and the jars have fully cooled, remove the rings and wash the jars in warm soapy water.
- Store the rings to reuse, then label each jar with the name and date before storing.
Notes
- Add flavor and seasoning: While you can simply shrimp with water, adding some seasoning can enhance the flavor. You can use salt, pepper, garlic, or other spices.
- Pack the jars properly: Fill hot, sterilized canning jars with the prepared shrimp, leaving enough headspace as specified in the recipe. Headspace allows for proper expansion during the canning process.
- Add liquid: Pour boiling water, shrimp stock, or a mild brine (follow the recipe guidelines) over the shrimp in the jars, leaving the specified headspace.
- Store in a cool, dark place: Find a cool, dry storage area to keep your canned shrimp. A pantry or cellar works well if it maintains a consistent temperature and is away from direct sunlight.
- Check for spoilage: Inspect your canned shrimp for signs of spoilage, such as a broken seal, visible mold, or any off smells or flavors. If you encounter any issues, discard the contents immediately.