Note: The canning recipe for corned beef has not been tested or endorsed by NCHFP (National Center for Home Food Preservation). The following recipe is only my personal experience and testing, shared for informational purposes, read only. I do not encourage following or attempting this recipe.
Utilize the skill of pressure canning to enjoy the mouthwatering flavors of delicious corned beef all year long. Goodbye to insufficient supply, and welcome to a cupboard filled with handmade deliciousness.
This recipe recap my own journey pressure canning corned beef brisket.
Prepare for a gastronomic journey as we explore the world of pressure canning and reveal a corned beef dish that will delight your palate!
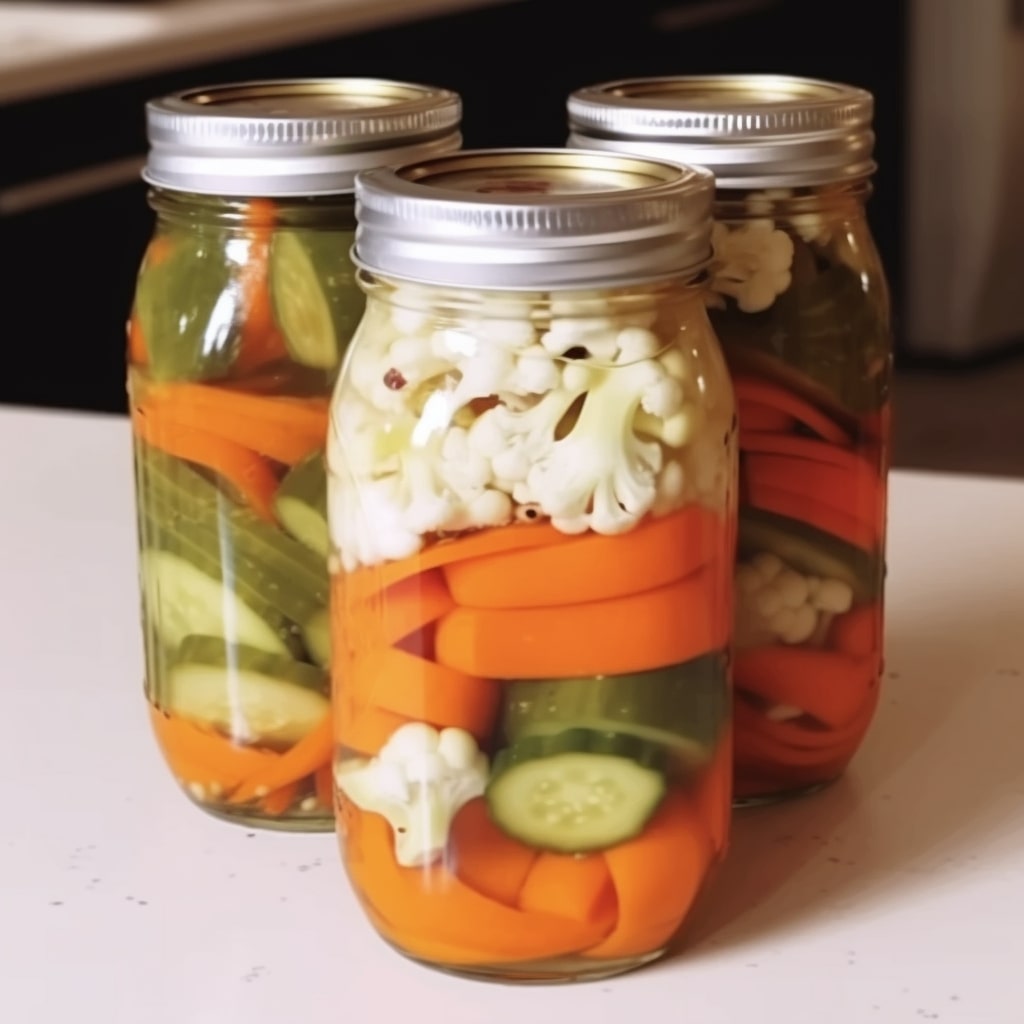
Whole ingredients needed for pressure canning corned beef

Source: Youtube@kathy Ottersen
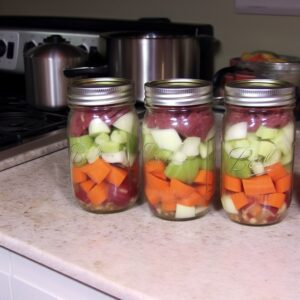
- 3 potatoes, peeled, cut into small pieces
- 3 carrots, cut into 1-inch pieces
- 1 onion, diced
- 1 flat corned beef brisket with seasoning packet
- 1 can (12 oz) of beer or 2-3 glasses of rice wine, or 1 glass of wine (8 – 10oz)
- Water (about 3-5 cups)
- 1 cabbage (cut into small pieces)
- Peppercorns
- Veggies
I’ve got to examine several methods for pressure canning corned beef and gain some important knowledge. I observed that the following components are necessary for a tasty and well-preserved outcome.
Let’s start by discussing the dish’s main ingredient, the corned beef brisket. I advise using flat-cut brisket and the spice packet that comes with it. The brisket is ideal for pressure canning since it has a delicious blend of hearty tastes and a soft texture. Typically, the seasoning package comprises a mixture of spices that exquisitely improve the flavor of the meat.
According to my tests, adding some veggies significantly improves the corned beef’s overall taste profile. I advise adding three small-diced, peeled potatoes to the recipe since they give the food a pleasant texture.
Along with the potatoes, three carrots, diced into 1-inch chunks, add a little sweetness and vibrant color that go nicely with the meat.
My pressure canning recipe always includes chopped onion to improve the delicious flavor further. The meal gains depth and complexity by adding onions, providing a delectable taste.
Although the classic recipe frequently asks for a can of beer, I’ve also used rice wine or wine as substitutes with amazing results. According to my research, a 12-ounce can of beer, two or three glasses of rice wine, or one 8- to 10-ounce glass of wine all work perfectly. These liquids provide the meat moisture and give it wonderful subtleties that increase its flavor.
You’ll need 3 to 5 cups of water to generate the requisite steam and pressure. This enables the corned beef to cook while retaining its moisture, making the finished product luscious and tender fully.
Preparing the beef brisket ready for canning
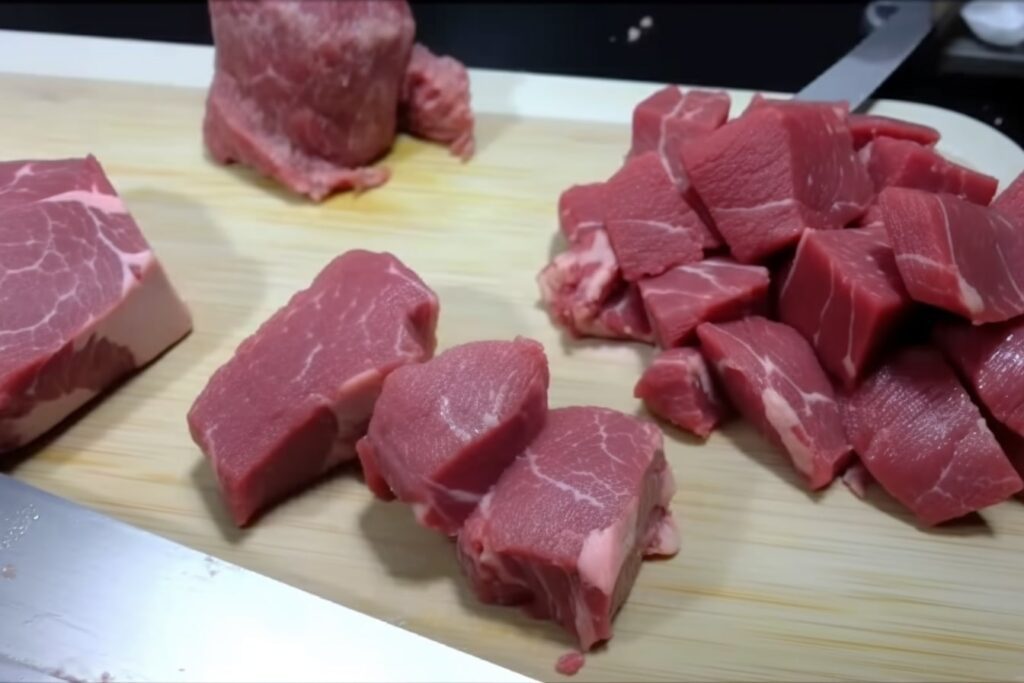
I’ve found that it’s important to trim the beef brisket off as much fat as possible when it comes to canning. I always give it priority before beginning the canning process.
We can prevent greasy circumstances that prevent the lids from vacuum sealing effectively by lowering the fat content. Additionally, it lessens the possibility of fat going rancid in the jars, which might cause spoiling. So let’s remove that extra fat for the best outcomes!
Here’s a tip I learned throughout my research: although it’s crucial to remove fat, we shouldn’t rinse the meat afterward. Why? Well, I discover that as the meat is being cooked, part of the brine naturally sticks to it and improves the flavor. Therefore, we want to leave the brisket’s mouthwatering brine on it to boost our canned dish’s flavor.
Hold your horses, however! The meat cannot yet be put into the jars since we have yet to be ready. Before we can move further, there are a few more tasks to complete.
My key is ensuring our canning jars and lids are completely prepared. We need to give them a thorough clean and thoroughly sanitize them since it’s a team effort. I often use my dishwasher or briefly boil the items in boiling water for cleaning. Our canning journey must take place in a safe setting, and good cleanliness is essential.
Seasoning your corned beef brisket
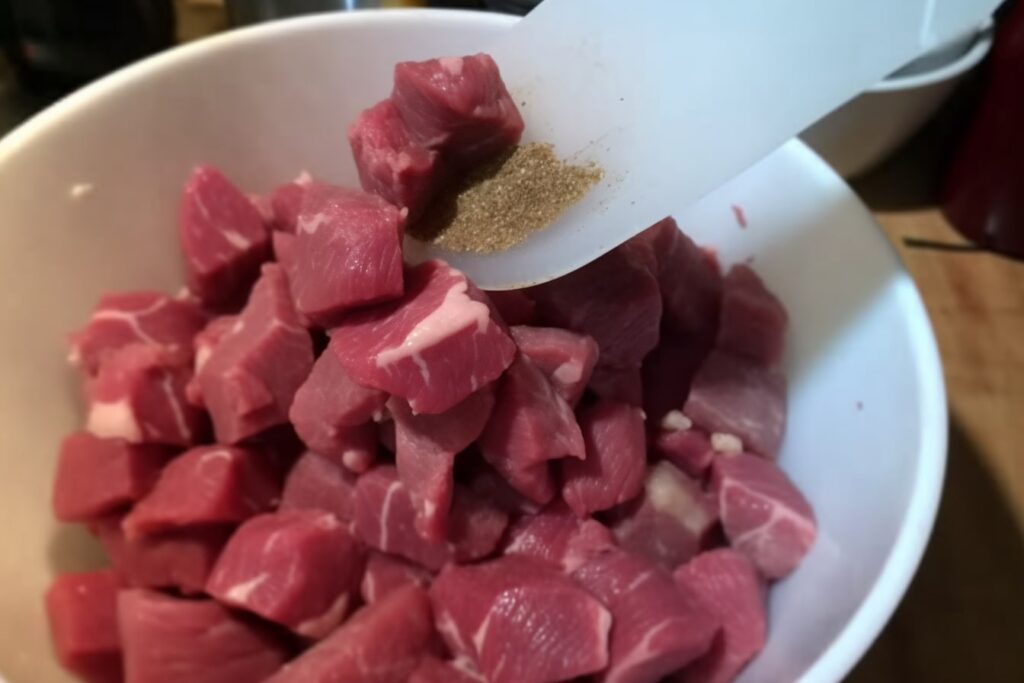
Seasoning your corned beef brisket is an exciting opportunity to elevate its flavor and make it extraordinary. From my experience, I’ve discovered a few tips and tricks that I’d love to share with you. So, let’s dive in and explore the art of seasoning corned beef!
When you purchase corned beef brisket from your local store, it often comes with a seasoning packet. These little flavor boosters can make a difference in enhancing your brisket’s taste. We recommend following these steps based on our experiments:
- The meat should be placed in a large dish before being transferred to the cooking jar. This process allows the taste to penetrate the meat more fully. When you take that first wonderful mouthful, believe me! The additional work was worth it!
- Open a flavor package and generously sprinkle the meat with it now. Get your hands filthy here without fear! Using your hands, combine the seasoning with the meat to distribute the flavors evenly. The magic arises when your touch combines fragrant spices to create a delicious flavor.
- If you’re working with multiple roasts, repeat this process with each flavor packet. Layering the seasoning adds depth and complexity to the overall taste. From my testing, the different spices in each packet can create a delightful symphony of flavors in every mouthful.
However, there might be instances when your corned beef doesn’t come with a seasoning packet. Don’t worry; we’ve got you covered! Here’s what I recommend based on my kitchen adventures:
- Gather 1 dried bay leaf, 6 cloves, and 1/2 teaspoon of black peppercorns in a cheesecloth. You might think of it as making your small spice bouquet.
- By tying the cheesecloth firmly with string and constructing a pouch, you can keep the spices contained within. This pouch will guarantee that the flavors cook into the meat without contaminating the cooking liquid.
- Add this handmade spice bag to the pan as the corned beef cooks. The flavors gradually escape as the heat fills the meat with mouthwatering scents and flavors.
- My experiences have shown that utilizing premium spices and fully integrating the seasoning may greatly impact the result. An average corned beef brisket may become an outstanding gourmet treat thanks to one easy step, leaving your taste senses wanting more.
I recommend embracing the seasoning process and letting your creativity shine. Feel free to experiment with different flavors and spice combinations. After all, the joy of cooking lies in exploring new possibilities and making the dish uniquely yours.
Process pressure canning corned beef jars

Now for the fun part: using a pressure canner to store your corned beef in jars. I’ve researched this technique, and it’s a great way to make your corned beef last longer.
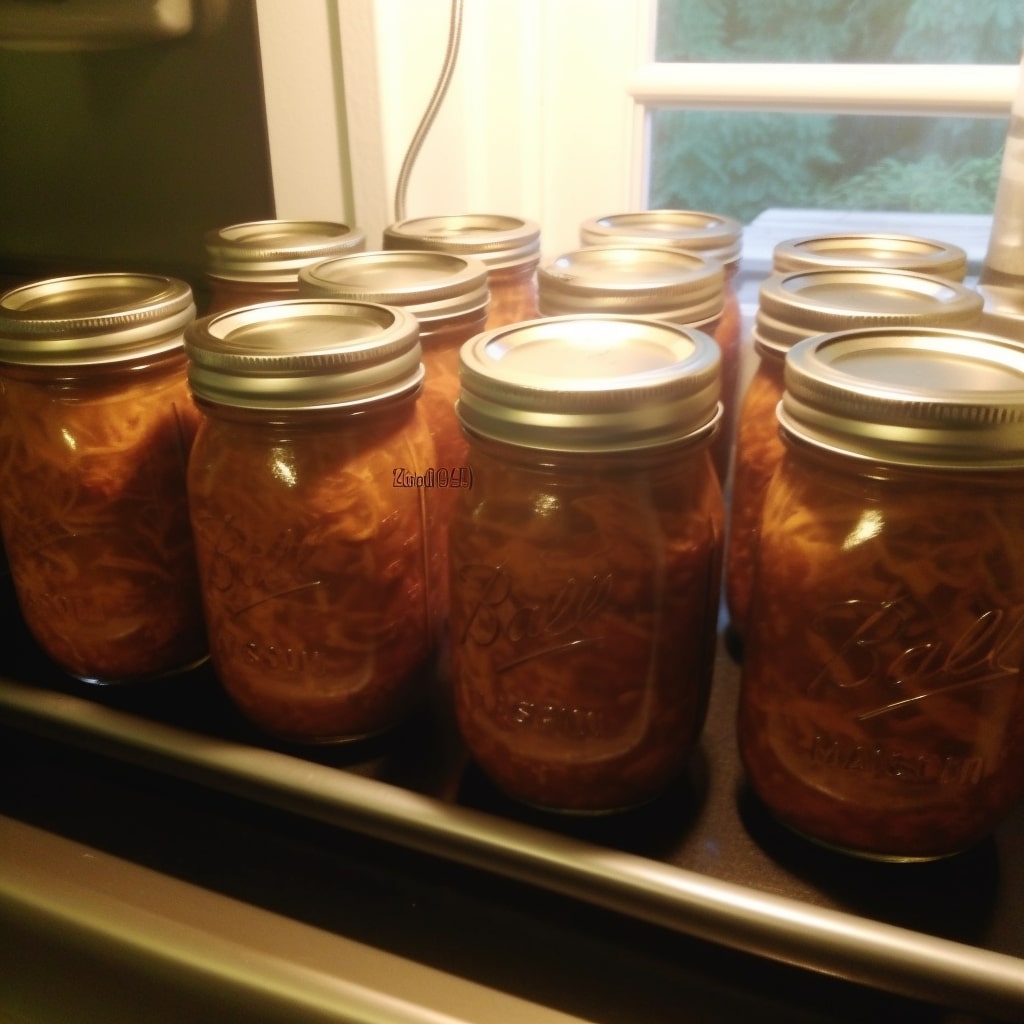
The jars in your pressure canner should now be processed. I have a pressure canner with up to 16 pint-sized jars measuring 23 qt. But I devised a clever plan because I only had 10: I put 8 jars on the bottom rack, then piled another rack on top, adding the final two jars. It performed flawlessly!
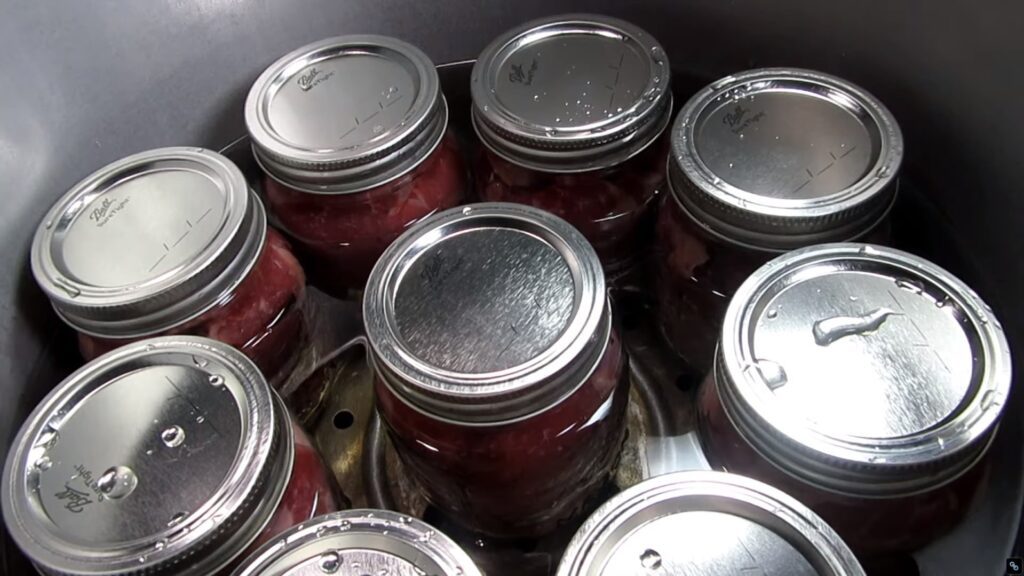
After arranging all the jars, shut the pressure canner’s lid and set the heat to high. Set your timer for 10 minutes as soon as the canner begins to boil and steam emerges from the vent. This vital step enables the canning chamber to completely evacuate the air, enabling a secure and efficient canning procedure.
After those 10 minutes, you’ll notice the jiggler beginning to shake, and the pressure gauge reaches the proper pressure. Now, reduce the heat to a level with consistent pressure, and the jiggler keeps moving every few seconds. This is the ideal moment to set your timer for 75 minutes and let the pressure canner work magic.
Turn off the heat entirely when the 75 minutes of processing are over, but resist the impulse to take the jiggler out. It’s crucial to leave the pressure canner alone until the pressure drops back to zero. When everything is secure, remove the canner’s top and carefully place the jars on a cloth to cool.
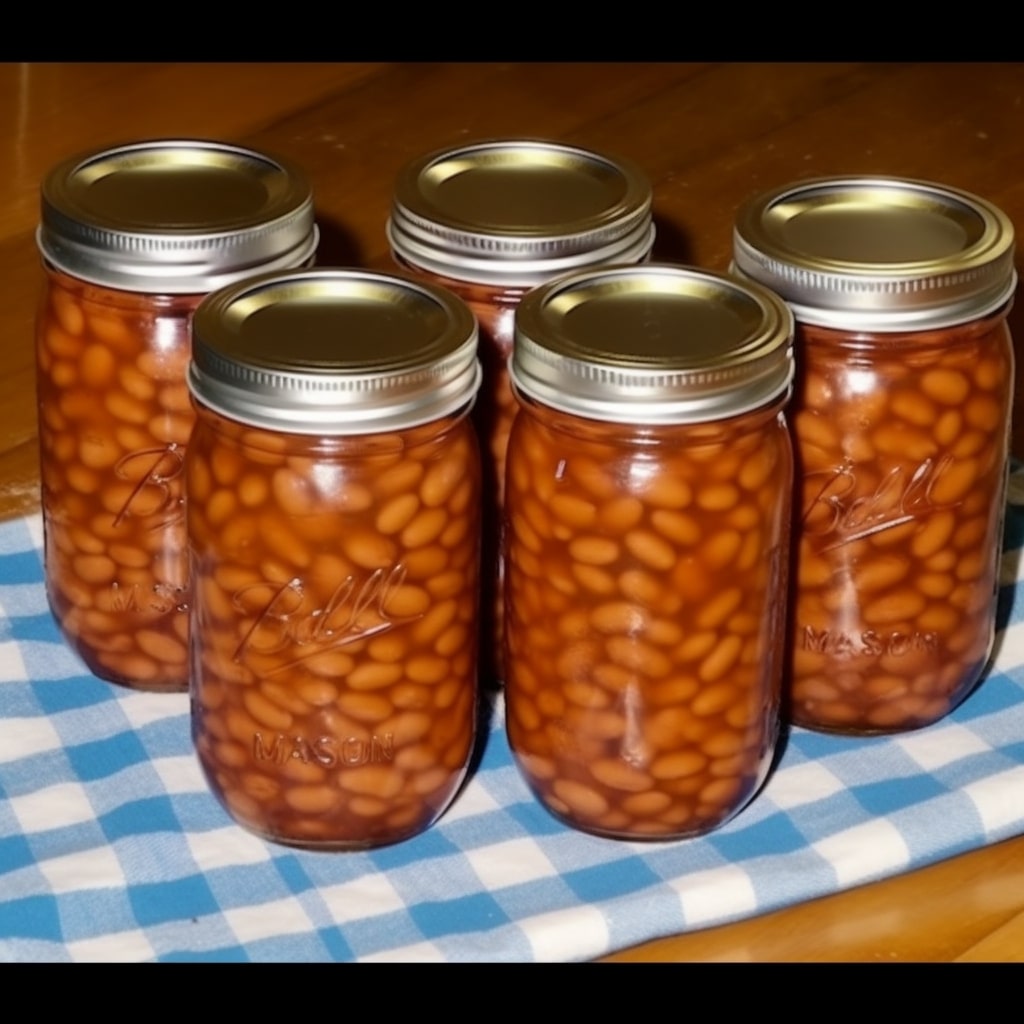
After the jars have cooled, it’s time to check the lids for a good seal. Hold each jar by the lid and give it a gentle tug. If it pops off easily, that particular jar needs to be refrigerated and used right away. However, if the lid holds firmly, you can rest assured that you’ve achieved a proper seal, and the jar is good to go!
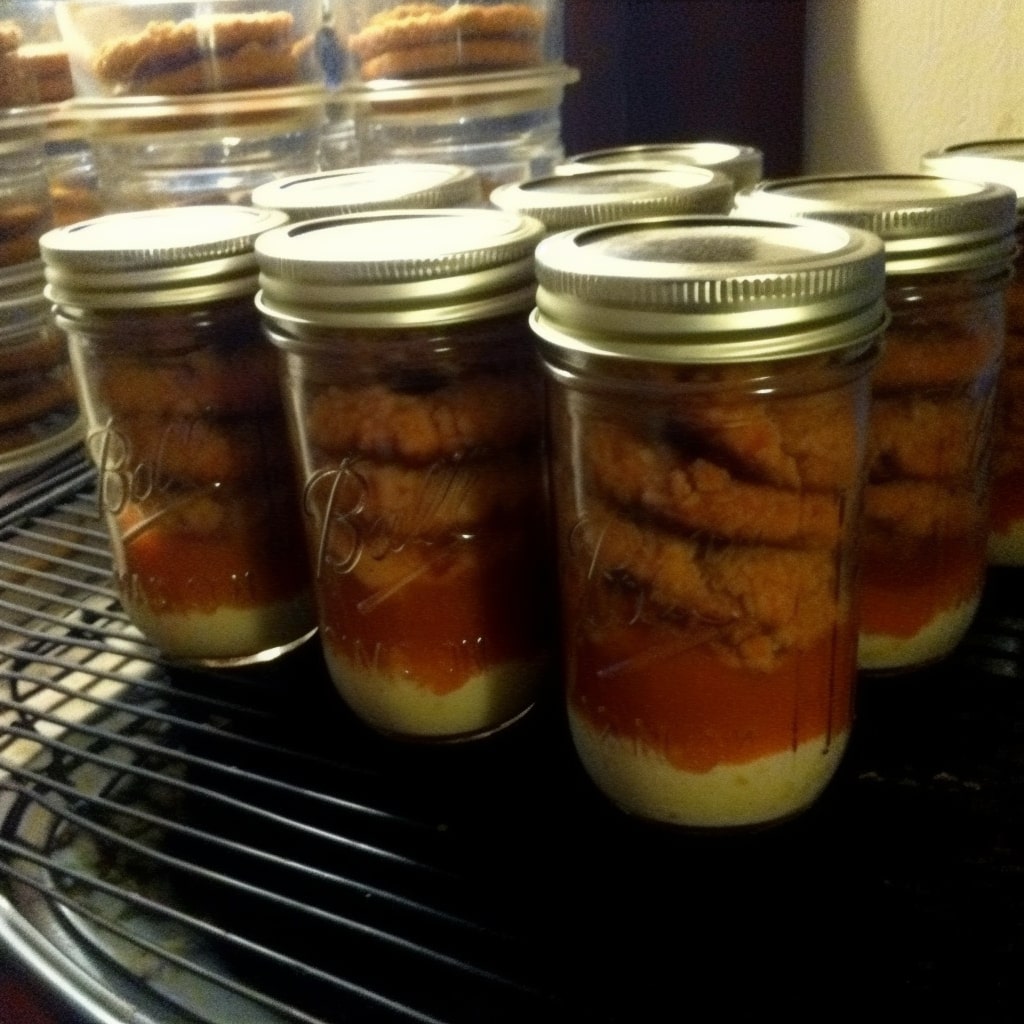
You may notice that the cooled jars contain plenty of delicious broth and a delightful fat cap at the top. This is perfectly normal and adds to the flavor profile of your preserved corned beef. In some cases, like mine, siphoning can occur during the canning process, leaving the cooled jars with greasy exteriors.
But don’t worry! A quick wash with warm, soapy water will take care of that. Then, you can proudly label your jars and store them in your pantry for future enjoyment.
Pressure Canning Corned Beef Brisket Recipe
Equipment
- 1 Pressure Canner
- 8 Mason Jars
Ingredients
- 3 potatoes peeled, cut into small pieces
- 3 carrots cut into 1-inch pieces
- 1 onion diced
- 1 flat beef brisket with seasoning packet
- 3 cups Water
- 1 cabbage cut into small pieces
Instructions
Preparing the beef brisket
- Trim off excess fat from the beef brisket before starting the canning process.
- Removing fat helps prevent greasy circumstances that hinder effective vacuum sealing of the lids.
- Lowering the fat content reduces the risk of fat going rancid in the jars and causing spoilage.
- Do not rinse the meat after removing fat to retain the flavorful brine that naturally sticks to the meat during cooking.
- Ensure the canning jars and lids are thoroughly cleaned and sanitized before use.
- Use a dishwasher or briefly boil the jars and lids in water for cleaning.
- Maintain a safe and clean environment throughout the canning process for optimal results.
Pressure Canning
- Use pressure canning to store corned beef in jars for longer preservation.
- Arrange the jars in a pressure canner, ensuring a secure and efficient process. After that, boil and steam the canner for 10 minutes to evacuate air from the chamber.
- Maintaining consistent pressure for 75 minutes allows the canner to work its magic. Then, let the canner cool naturally until the pressure drops to zero.
- Refrigerate jars with loose lids, and store properly sealed jars in the pantry.
- Wash the greasy exteriors of jars with warm, soapy water.
Notes
- Ensure there is sufficient liquid in the canner. Inadequate liquid can result in undercooked food or canner damage. Add enough water according to your canner’s instructions.
- Leave recommended headspace when filling jars to allow for expansion during processing. This helps prevent jar breakage and ensures safety.
- Double-check jar seals after processing. A properly sealed jar should not flex when pressed in the center, ensuring the preservation of your delicious corned beef.