Everyone is familiar with the calming effects of homemade chicken soup, particularly when they are feeling under the weather. When we’re sick, imagining the stamina to make a soup from scratch might be difficult. Be at ease! Pressure canning is the answer that will rescue the day.
You may have a healthful and ready-to-eat treatment on hand whenever illness comes by using this straightforward homemade chicken soup recipe for canning and the benefits of pressure canning.
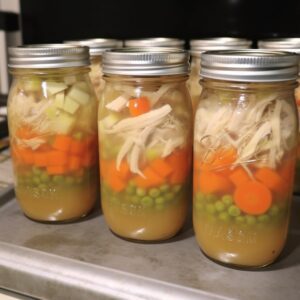
Prepare to enjoy the comfort and health benefits of a steaming bowl of chicken soup you easily make at home.
Delicious soups start with a flavorful chicken stock
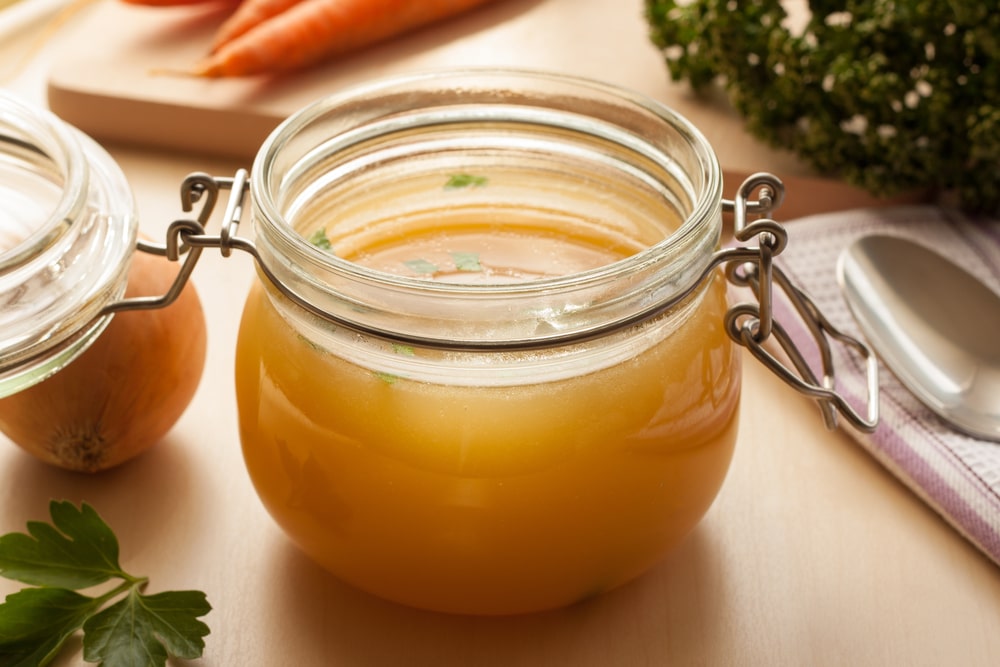
Delicious chicken stock is sometimes the basis of a delectable soup. A well-made chicken stock’s rich, delicious flavor is the basis for various healthy and soothing soups. I’m delighted to share some knowledge and advice with you today on making a delicious chicken stock that will elevate your soups.
I’ve spent numerous hours experimenting with and perfecting my chicken stock recipe, and based on my findings, I can declare with certainty that making your stock is the best option. In addition to having a better flavor than those from the market, making your stock gives you more control over the ingredients and makes it healthier and more individualized.
A few essential components are required to prepare a delectable chicken stock: water; aromatic vegetables like onions, carrots, and celery; fresh herbs like parsley, thyme, and bay leaves; and chicken bones, such as carcasses or leftover bones from roasting chicken. The slow simmering method, which draws out all the great flavors from these components, works like magic.
The chicken bones should be baked in the oven until golden brown. This process gives the stock more richness and depth. Slice the veggies into big pieces while the bones roast, keeping the onions peel on for color. Although this may sound unusual, trust me – it works miracles.
Then the broth is strained and refrigerated overnight so the fat will rise to the top and can be skimmed off before use. This recipe requires about 16 cups (4 quarts) of prepared chicken stock. Use stock or broth that is made fresh, canned, or frozen
Preparing ingredients for your chicken soup
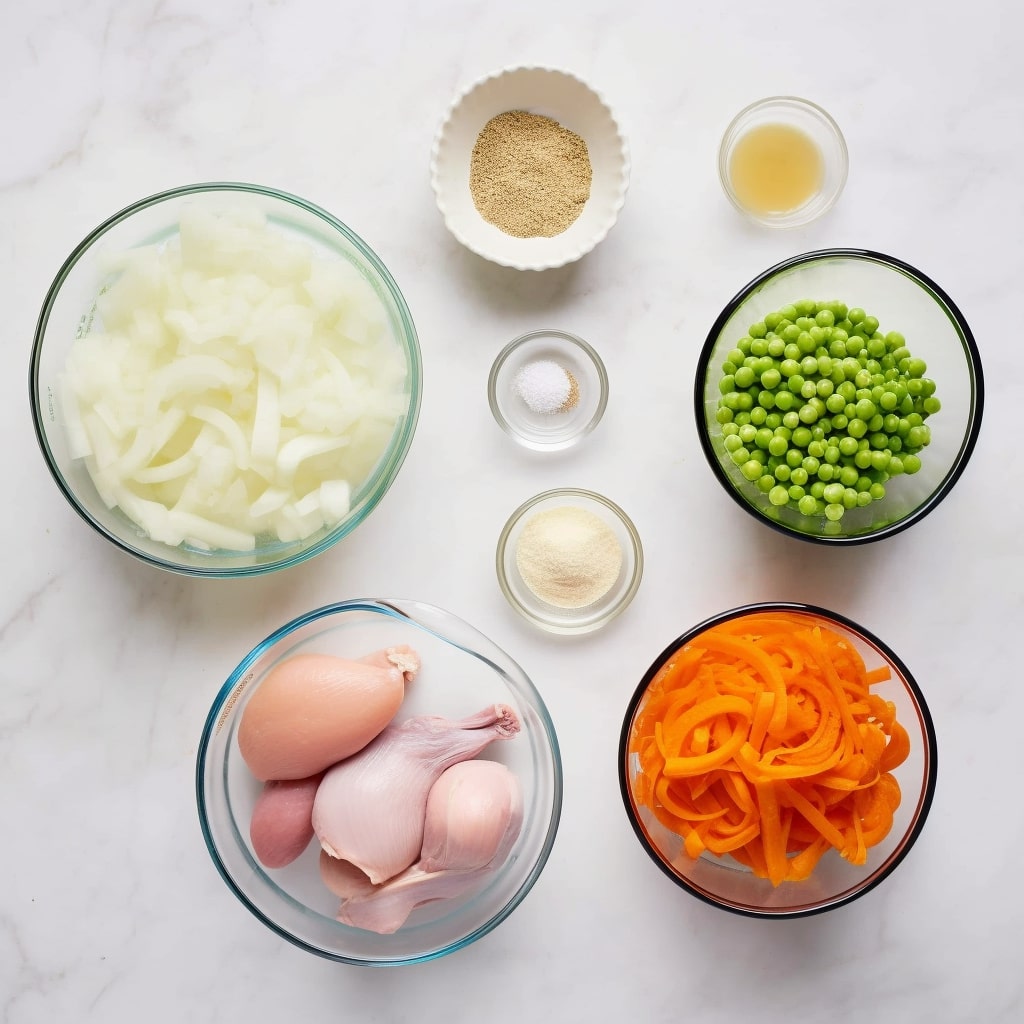
- 4 quarts of homemade chicken broth ( or chicken stock)
- 3 cup of diced and cooked chicken
- 1 cups celery, chopped (roughly 3 stalks)
- 1 cup of sliced carrots
- 1 cup of chopped onion
- 1 cup of peas
- Salt and pepper to taste
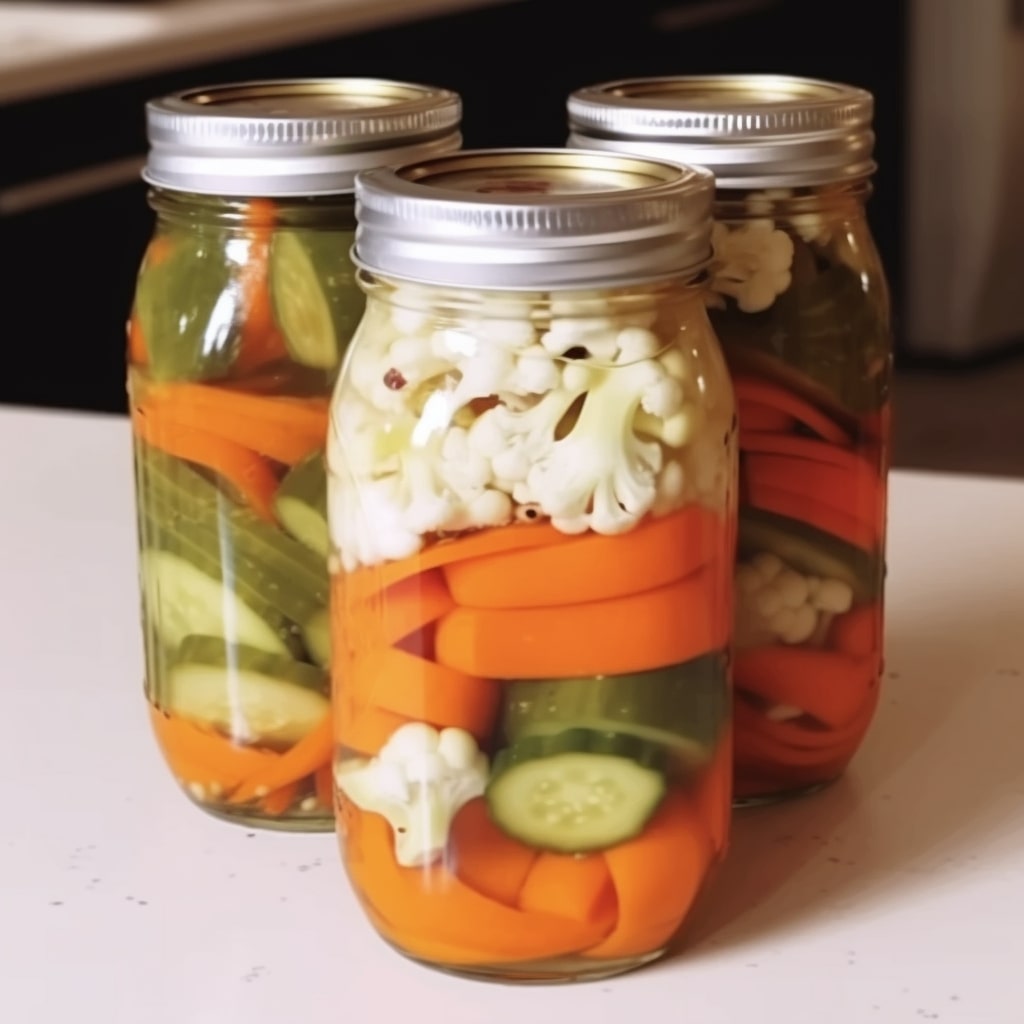
Let’s start by discussing recent veggies. For your soup, we highly advise choosing fresh veggies. Believe me, the finished meal will taste and look many different thanks to the brilliant colors. On the other hand, frozen veggies can be a fantastic substitute if fresh vegetables are not easily accessible. In my research, I discovered that fresh and frozen veggies may provide delectable outcomes.
Now, there are several alternatives available when selecting your vegetables. You may mix and match any vegetables you like, from asparagus to string beans, carrots to maize, and onions to tomatoes. I advise keeping the veggies in pieces based on my tests. To ensure thorough cooking during the pressure canning process, this enables the heat to permeate and surround them uniformly.
If you want dried beans or peas, remember to soak and completely rehydrate them beforehand. This step is crucial to guarantee that the beans or peas simmer appropriately throughout the canning process. I discovered this the hard way in my early tries, but after giving the beans and peas ample time to soak, they performed flawlessly in my soups.
Let’s now discuss some substances to stay away from. It’s best to avoid preserving pumpkin, winter squash, broccoli, or cauliflower in soups, according to my study and experience. These veggies frequently bunch up tightly and include compounds that could prevent proper processing. Additionally, no tested and studied recipes are available at the moment.
It’s vital to remember that thickening agents don’t work well with the canning process. I advise against thickening your home-canned soups with noodles, spaghetti, rice, flour, or other substances. The starch may compromise the safety of your canned soup in these components interfering with the appropriate heat processing. Let’s save the thickening for when you’re ready to serve your delectable homemade soup, which will be later.
Finally, dairy products should be kept from home. My research led me to the conclusion that cream and milk cannot be securely canned at home. To preserve the safety and lifespan of your canned masterpieces, it is thus advisable to leave them out of your soup recipes.
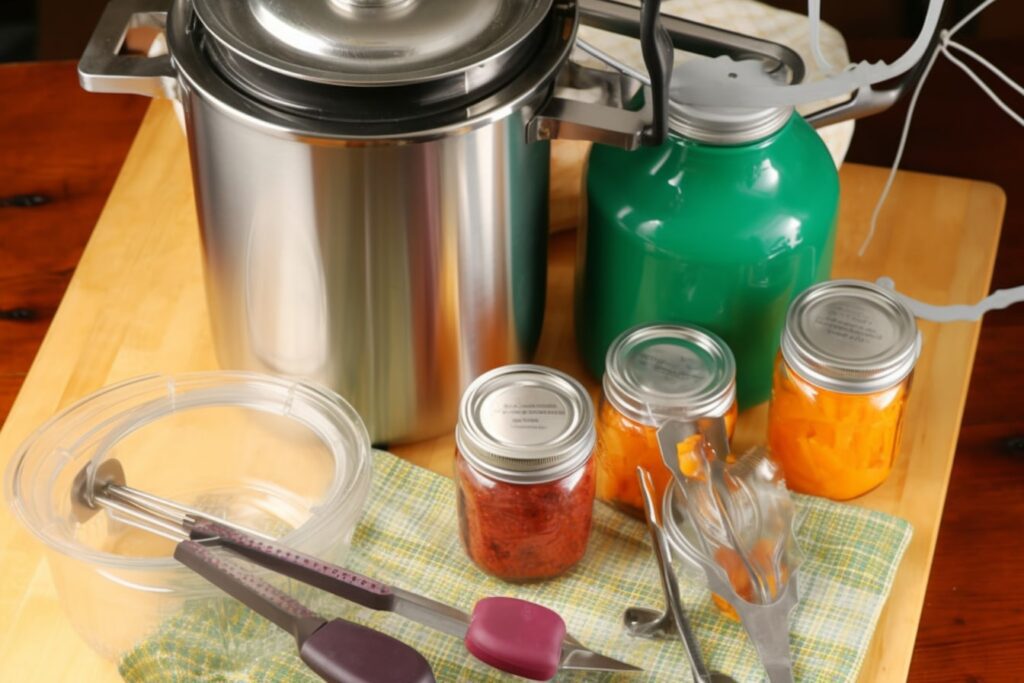
Essential equipment for desired chicken soup jars
To create the perfect chicken soup jars, it’s essential to have the right equipment on hand. Let’s look at the must-have tools that will help you achieve your desired chicken soup in jars.
- Pressure canner with canning rack
- 8 pint sized canning jars, or 4 quart-sized jars
- Canning lids and bands (new lids for each jar, bands can be reused)
- Canning tools: jar lifter, canning ladle, funnel, and bubble popper
- Plus basic kitchen supplies such as a slotted spoon and clean kitchen towels.
Step-by-step making your chicken soup recipe for canning
Here’s a step-by-step guide to making and canning homemade chicken soup. Canning your soup allows you to enjoy its delicious flavors and nourishing goodness throughout the year. So, let’s get started!
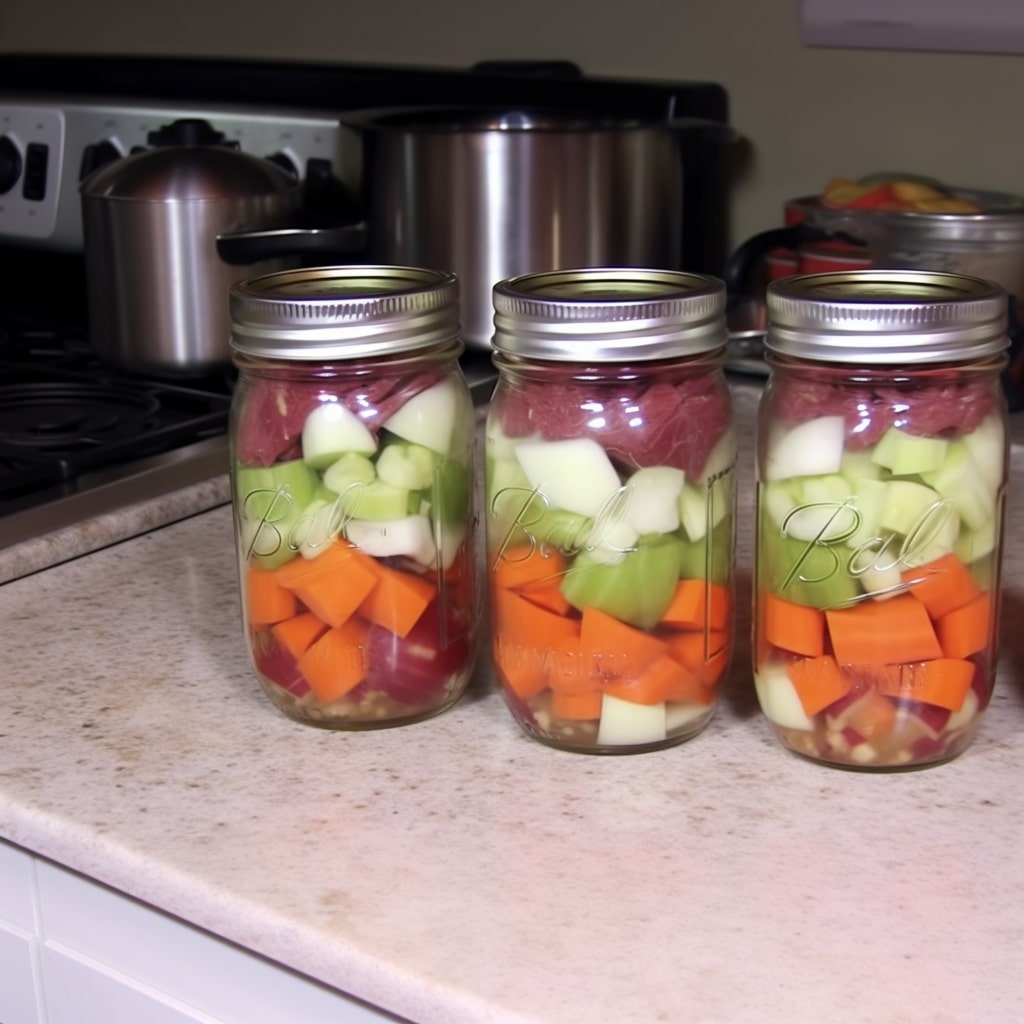
Step 1: Prepare the Vegetables
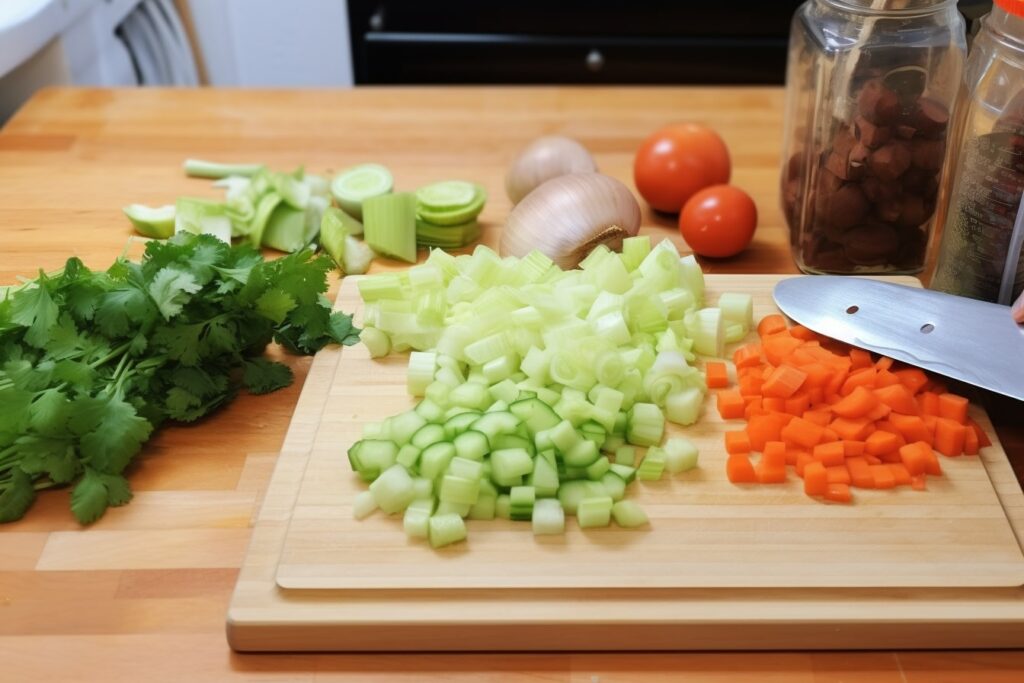
Let’s start chopping the veggies for our delectable chicken soup first. My usual approach is to use a variety of ingredients, including string beans, carrots, celery, frozen peas, and sliced onion. Nevertheless, feel free to alter it to suit your tastes. In my opinion, I think veggies that may be safely pressure-can are essential for a successful canning procedure.
Before proceeding, it’s essential to wash your fresh vegetables under clean, running water thoroughly. You might be surprised to know that bacteria can reside on the peeling of carrots and tomatoes, so make sure to peel them before use. Additionally, remember to remove the ends and skins from the onion and dice it finely. If you opt for dried beans or peas, remember that they must be soaked and rehydrated before canning.
Finally, you must add the previously prepared chicken broth to fill each jar. These operations may take a few minutes. Don’t forget to use a paper towel to clean the sides of the jar and put the lid back on.
Step 2: Make the soup
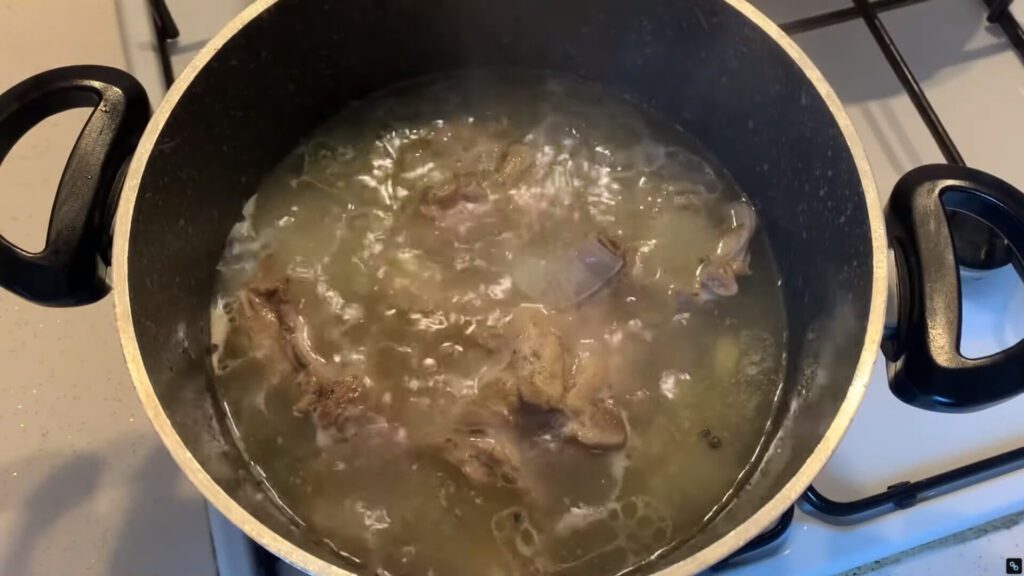
It’s time to prepare the warming soup base now that the veggies have been prepared. It’s crucial to cook the chicken first if you’re using it raw, as I frequently do.
Personally, I’ve found that boiling it on the stovetop or roasting it in the oven to get it soft works miracles. You’ll need a 3- to 4-pound entire chicken or around 1 1/2 pounds of boneless chicken breasts or thighs for this dish. About 3 cups of cooked chopped chicken will result from this.
Take a moment to remove the skin and bones from your chicken when it has finished cooking and cooled, then cut it into bite-sized 1-inch pieces. Let’s mix the chicken stock, chopped veggies, diced chicken, parsley, and any additional seasonings you like in a large saucepot.
The saucepan should be heated to a mild simmer (about 180°F) before coming to a boil. A genuinely delectable soup will result from giving the flavors time to mingle, which should take around 15 minutes. Let’s get started setting up the canning supplies while the soup simmers.
Step 3: Prepare the Canning Equipment
Before we embark on the canning adventure, let’s make sure we have all the necessary equipment at hand. Here’s what we’ll need:
- A trusty pressure canner with a canning rack
- 8 pint-sized canning jars or 4 quart-sized jars
- Fresh canning lids and bands (remember, the lids should be new for each jar, while the bands can be reused)
- Essential canning tools: a jar lifter, canning ladle, funnel, and bubble popper
- Basic kitchen supplies such as a slotted spoon and clean kitchen towels
Let’s now make everything spotless! A crucial step is to wash the canning jars, lids, bands, and canning equipment in hot, soapy water. The lids and bands should be completely rinsed before being left away until we are ready to use them.
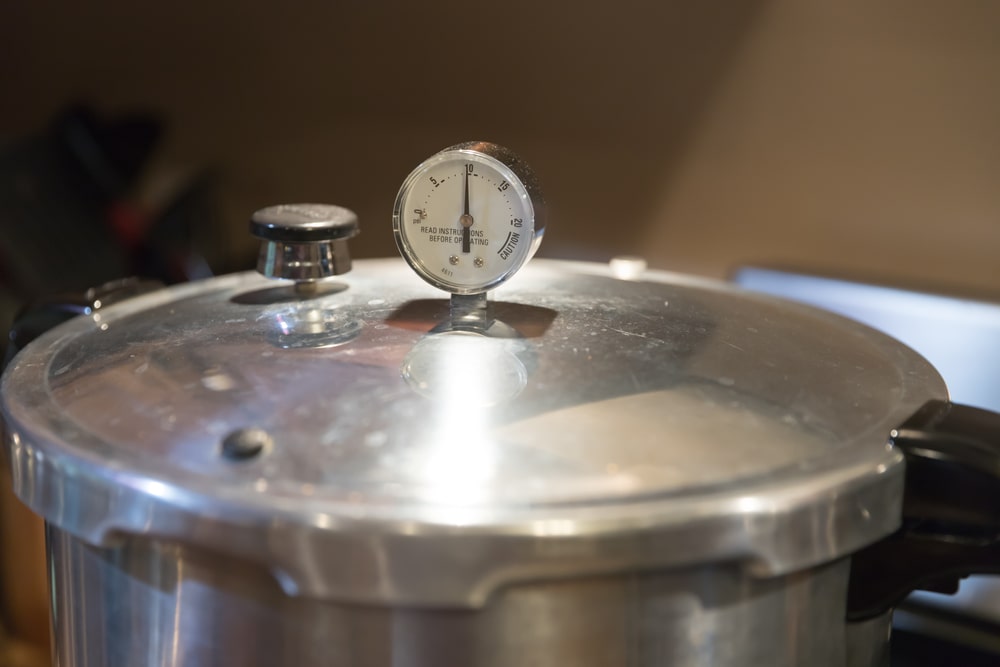
It’s time to assemble the pressure canner next. Place the canning rack inside and set it on the heat. Depending on the precise directions for your pressure canner, you may need more or less water. For instance, according to my experience, Presto calls for 3 quarts of water, Mirro recommends 2, while All American calls for 2 to 3 inches. After carefully positioning them on the rack in the canner, fill the clean jars halfway with boiling water.
While the canner preheats, let’s check on our simmering soup. It should be looking and smelling delightful by now!
Allow it to cook for another 30 minutes, giving the flavors ample time to meld together. Now, let’s move on to the exciting canning process!
Step 4: Pressure Can Your Chicken Soup
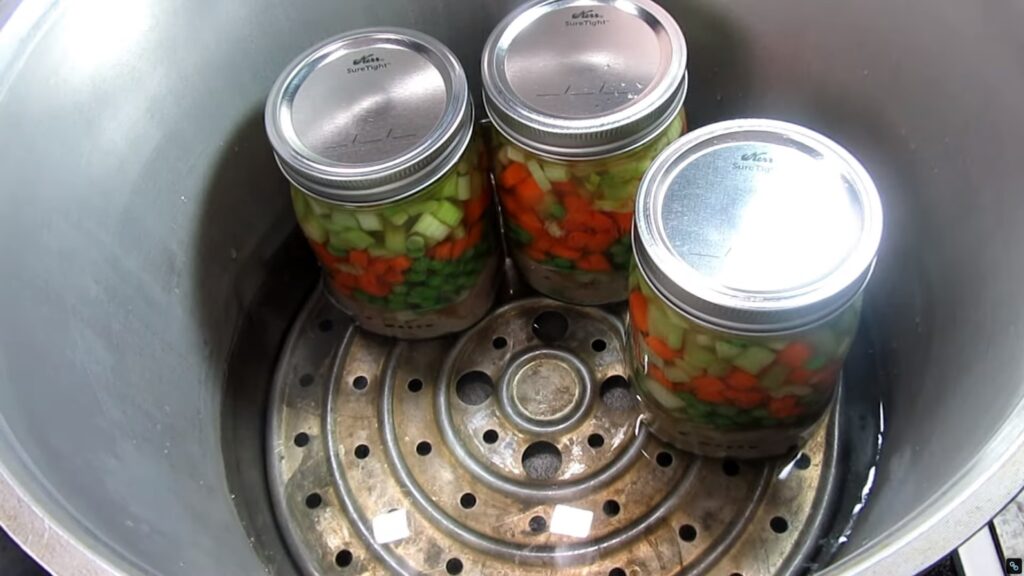
Let’s set up shop and gather the tools we’ll need before we begin canning the chicken soup. Spread a clean kitchen towel out on the counter to provide a secure and orderly area for our canning expedition. Carefully take a jar from the canner using a jar lifter, drain the hot water, and set the jar on the towel.
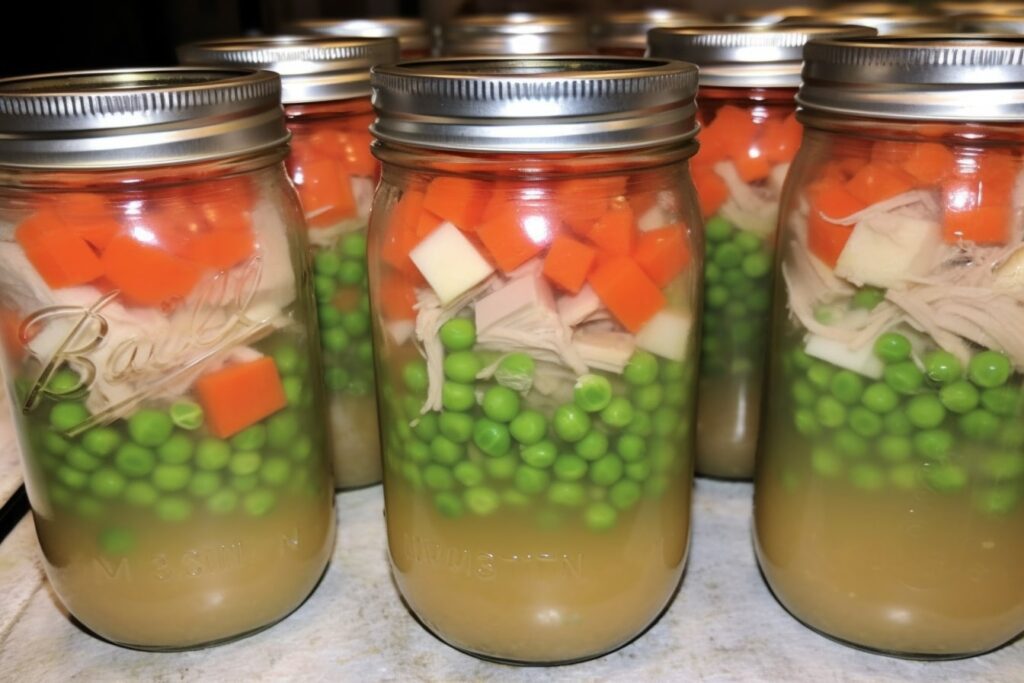
Get out your go-to canning funnel and use a slotted spoon to roughly halfway fill the jar with the soup’s solid components. After that, pour the liquid over the solids, leaving 1 inch of headspace at the jar’s top. As I’ve discovered via my research, this headspace is essential to allow for expansion throughout the canning process.
Once the jar is full, use the bubble popper to eliminate any air bubbles by passing them through.
Ensuring no air pockets is crucial since they can affect the durability and flavor of the canned soup. Next, spend a few seconds thoroughly cleaning the jar’s rim. Although it’s sometimes skipped, this step is crucial for getting a good seal.
It’s time to close the transaction now that every jar has been properly filled. Lock the canner’s lid into place and set it firmly on top.
Now let’s increase the heat and heat the canner to medium-high until it boils. Following the manufacturer’s directions is essential for getting the greatest outcomes, I’ve learned through my testing and research.
Step 5: Achieve Your Tasty Jars
Congratulations! You’ve successfully pressure canned your very own chicken soup. Now, it’s time to let everything cool down and bask in your culinary accomplishment. Allow the canner to cool naturally, resisting the temptation to rush the process.
Once it has cooled, carefully remove the jars from the canner, not jostling or disturbing them. Place them on a heat-safe surface and let them cool completely.
It’s best to wash the jars with warm, soapy water once they have cooled. This step ensures that any lingering food residue or stickiness is completely removed.
Let’s take a moment to quickly mark each jar with the contents and the canning date. Your priceless canned chicken soup will stay tasty and safe for 12 to 18 months if stored properly.
How long to pressure can chicken soup
It’s crucial to ensure you adhere to the suggested procedures when pressure-canning chicken soup to ensure safety and maintain its quality. Based on reliable resources like the Ball Blue Book Recipe and the USDA’s general soup canning recipe, I’d like to give tips on how long to pressure chicken soup today.
The original Ball Blue Book Recipe recommends a canning time of 75 minutes for pints and 90 minutes for quarts of chicken soup. Contrarily, the USDA’s general soup canning recipe suggests waiting 60 minutes for pints and 75 minutes for quarts, especially for broth-heavy soups like chicken soup.
According to my observations, the additional canning time specified in the Ball Blue Book Recipe does not appear to affect the soup’s overall quality. It’s important to note that the USDA’s recommendations are developed using considerable study and testing to guarantee food safety.
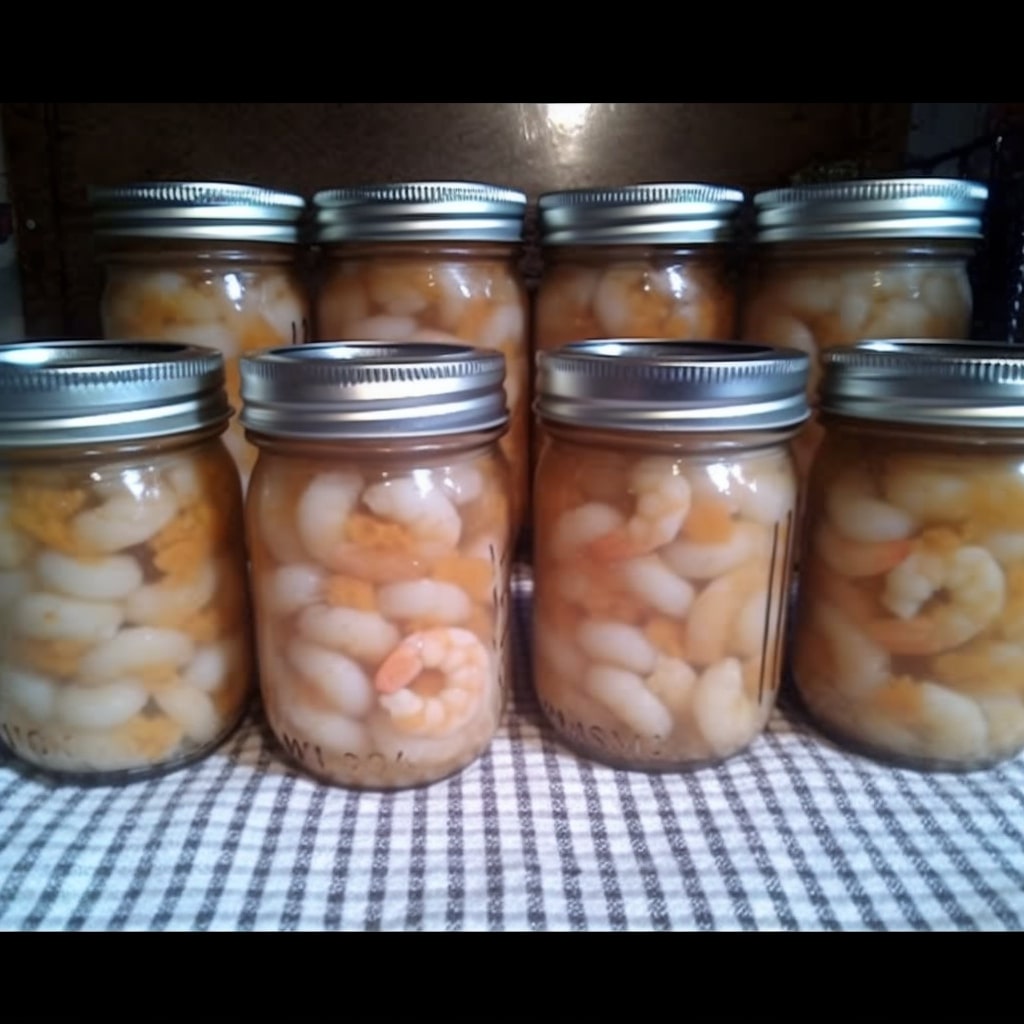
Combining heat and pressure during pressure canning is crucial for eliminating dangerous germs and guaranteeing long-term storage stability especially for meal in a jars like chicken soup itself or canning shrimp or any other meat canning recipes. The processing timeframes suggested by the recipes account for elements like the density and makeup of the components as well as the sterilization-inducing temperature.
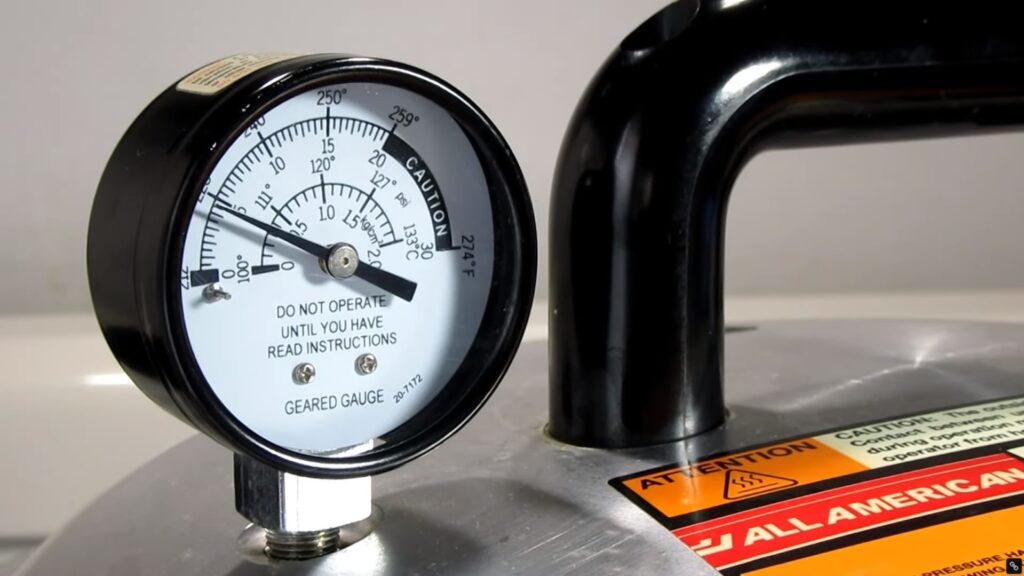
Required pressure for particular altitute
Did you know that the altitude you’re cooking can affect the required pressure in your canner? It’s true! Let’s dive into the fascinating world of altitude and pressure adjustments to ensure your chicken soup turns out perfect, no matter where you are.
The canning time remains the same regardless of altitude, but the required pressure changes above 1,000 feet in elevation.
- For dial gauge pressure canners:
- 0 to 2,000 feet in elevation – 11 lbs pressure
- 2,001 to 4,000 feet in elevation – 12 lbs pressure
- 4,001 to 6,000 feet in elevation – 13 lbs pressure
- 6,001 to 8,000 feet in elevation – 14 lbs pressure
- For weighted gauge pressure canners:
- 0 to 1,000 feet in elevation – 10 lbs pressure
- Above 1,000 feet – 15 lbs pressure
According to my research and experience at various altitudes, it is essential for successful canning to modify the pressure in your canner by the altitude. You shouldn’t worry about altering the amount of time your chicken soup cooks because canning times are the same regardless of altitude.
Serving homemade pressure canned chicken soup
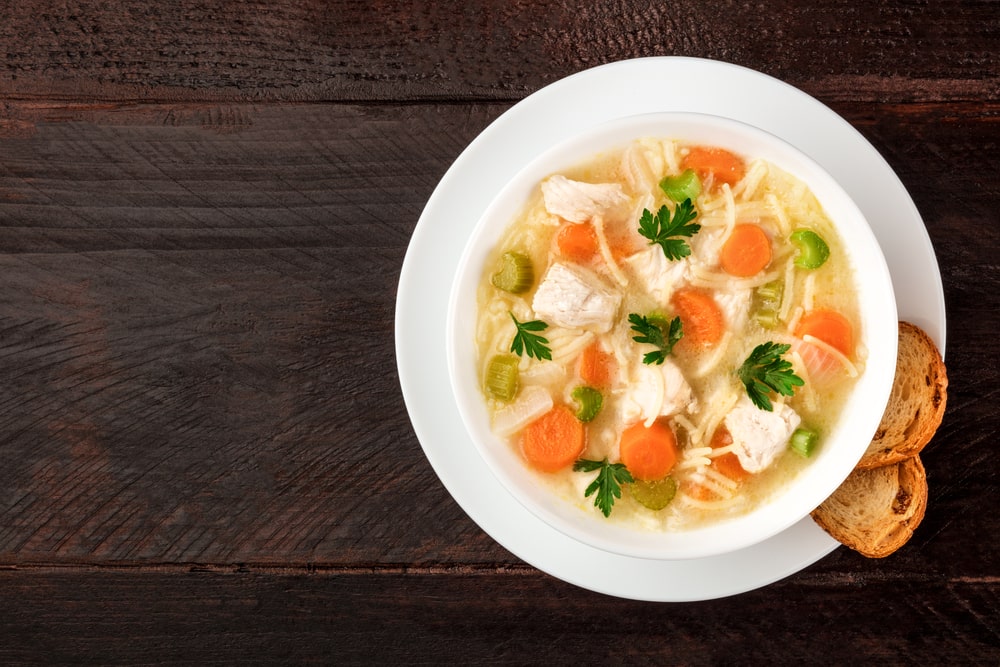
Reach for those jars of goodies you worked so hard to create when you’re ready to enjoy a warm bowl of chicken veggie soup. Open the top to let the handmade soup’s scent permeate your kitchen. Ah, the eagerness!
Put a saucepan of your chicken soup on the stovetop over medium heat to reheat it. Gently whisk the mixture after carefully adding the jar’s contents. The flavors in the soup come together wonderfully when heated on the burner.
Now is the time to get creative and add your flair! If you want to improve the experience, add some extra ingredients while the soup is warming. Rice, barley, or cooked pasta are excellent choices. They give your soup heartiness and make it into a whole meal.
Why not try creating your handmade egg noodles if you’re feeling daring? They give the soup a delicious touch, elevating it to a special status. Numerous recipes are available online to help you with the procedure.
Another powerful tool for elevating your soup is fresh herbs. The fragrant herbs, whether a dash of thyme, rosemary, or anything else, will give your soup an excellent taste and a genuinely gourmet feel.
Allow the soup to boil for a few minutes after adding the preferred additions to ensure everything is well heated, and the flavors blend perfectly. After giving it a taste, you can adjust the seasoning to your preference if you believe it needs more.
Based on my personal experience, serving chicken soup from a pressurized can is revolutionary. It delivers that cozy homemade flavor while saving time and effort. Additionally, it may be tailored to your preferences, making it a flexible lunch choice.
Chicken Soup Recipe For Canning
Equipment
- 1 Pressure canner with canning rack
- 8 Pintsized canning jars or 4 quart-sized jars
- Canninglids and bands (new lids for each jar, bands can be reused)
- Canning Tools jar lifter, canning ladle, funnel, and bubble popper
- Basic kitchen supplies
Ingredients
- 4 quarts of homemade chicken broth or chicken stock
- 3 cup of diced and cooked chicken
- 1 cups celery chopped (roughly 3 stalks)
- 1 cup of sliced carrots
- 1 cup of chopped onion
- 1 cup of peas
- Salt and pepper to taste
Instructions
Making Chicken Soup
- Wash the fresh vegetables thoroughly.
- Peel the carrots and tomatoes to remove bacteria.
- Dice the onion finely.
- Soak and rehydrate dried beans or peas if using.
- Fill each jar with previously prepared chicken broth.
- Cook the chicken and cut it into bite-sized pieces.
- Mix chicken stock, chopped veggies, diced chicken, parsley, and seasonings in a large saucepot.
- Heat the mixture to a mild simmer for 15 minutes.
Pressure Can Chicken Soup
- Gather the necessary equipment: pressure canner, canning jars, lids and bands, jar lifter, canning ladle, funnel, bubble popper, slotted spoon, clean kitchen towels.
- Wash all the canning supplies in hot, soapy water.
- Assemble the pressure canner and add water according to the manufacturer’s instructions.
- Preheat the canner and fill clean jars halfway with boiling water
- Use a jar lifter to take a jar from the canner and set it on a towel.
- Fill the jar with solid components and pour liquid, leaving 1 inch of headspace.
- Process chicken soup jars in the pressure canner for 75 minutes (pints) or 90 minutes (quarts), optimizing for altitude
- Use a bubble popper to remove air bubbles and clean the jar’s rim.
- Lock the canner’s lid into place and increase the heat to medium-high until it boils.
- Allow the canner to cool naturally.
- Carefully remove the jars and let them cool completely.
- Wash the jars with warm, soapy water.
- Label each jar with contents and canning date.
- Store the canned chicken soup properly for 12 to 18 months.
Notes
- To prevent contamination and foodborne diseases, maintain good hygiene and cleanliness throughout the canning process.
- Feel free to choose the veggies according to your preferences, but prioritize those that can be safely pressure-processed for effective canning.
- Prepare fresh veggies by thoroughly washing them in clean, running water. To get rid of microorganisms, peel the tomatoes and carrots. Slice onions thinly. If using dried beans or peas, soak and rehydrate them.
- Prepare the chicken by cooking it before putting it in the soup. It is advised to boil or roast the chicken until it is tender. Cut the chicken into bite-sized pieces after removing the skin and bones.
- Modifying your pressure matching your altitute (See section above)